{/* Google tag (gtag.js) */} SecTemple: hacking, threat hunting, pentesting y Ciberseguridad
Showing posts with label Linux on Android. Show all posts

Dominating Your Android: The Ultimate Guide to Native Kali Linux Nethunter Pro Installation 2024


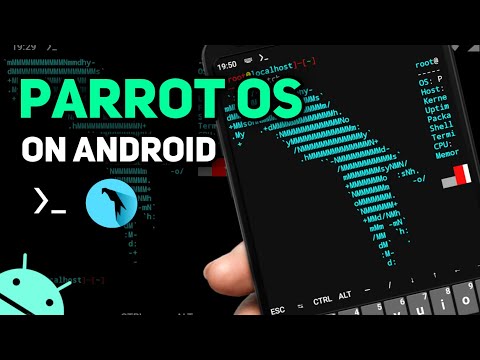
Unleash the Powerhouse: Kali Nethunter Pro on Android

In the ever-evolving landscape of cybersecurity, mobility is paramount. Imagine transforming your everyday smartphone into a formidable penetration testing machine, capable of running the full Kali Linux operating system natively. This isn't science fiction; it's the reality with Kali Nethunter Pro. This definitive guide will walk you through the intricate process of installing Kali Linux directly onto supported Android devices, bypassing the limitations of emulators. We'll equip you with the knowledge to leverage powerful tools like Wifite, Aircrack-ng, and Metasploit directly from your mobile device. Prepare to unlock a new dimension of ethical hacking and cybersecurity analysis, right from your pocket.

This isn't just a tutorial; it's a blueprint for mastering mobile-based offensive and defensive security operations. Whether you're a seasoned cybersecurity professional looking to expand your toolkit or an aspiring ethical hacker eager to learn, this dossier provides the critical intelligence you need.

Mission Prerequisites: Gear Up for the Install

Before initiating the installation protocol, ensure your operational environment meets the following critical requirements. Failure to comply may result in mission failure or data corruption.

  • Supported Android Device: Not all devices are compatible. Research device-specific Nethunter support. Popular choices often include devices with unlocked bootloaders and strong community support (e.g., some Poco, OnePlus, or Pixel models).
  • Unlocked Bootloader: This is non-negotiable. An unlocked bootloader permits the flashing of custom partitions. The process varies by manufacturer.
  • Data Backup: This procedure will irrevocably erase all data on your device. Back up everything critical: photos, contacts, documents, app data. Cloud backups are recommended.
  • ADB and Fastboot Tools: Install the Android Debug Bridge (ADB) and Fastboot tools on your computer. These are essential for communicating with your device in bootloader mode.
  • Kali Nethunter Pro Image Files: Download the specific Kali Nethunter Pro image files for your device. These typically include a `userdata.img` file and a `boot.img` file. Ensure you download from official or highly trusted sources.
  • USB Cable: A reliable USB cable for connecting your device to your computer.
  • Sufficient Battery Charge: Ensure your Android device has at least 80% battery to prevent interruptions during critical flashing stages.

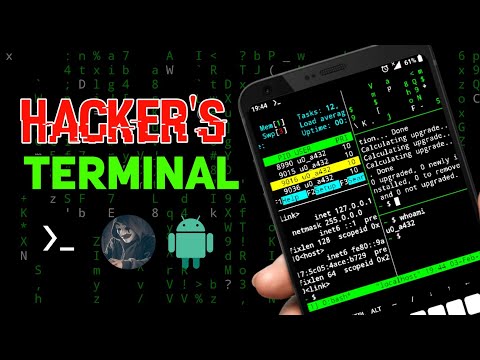
Executing Commands: The Fastboot Protocol

Fastboot is a low-level protocol that allows you to flash partitions on your Android device directly from a computer. Mastering these commands is key to a successful native Kali installation.

Entering Fastboot Mode:

Power off your Android device completely. Then, simultaneously press and hold the Power button and the Volume Down button. Continue holding until the device boots into Fastboot Mode (often indicated by a screen with Android robot imagery and text). Alternatively, if your device is connected via USB and ADB is authorized, you can use the command:

adb reboot bootloader

Verifying Connection:

Once in Fastboot mode and connected to your computer, verify the device is recognized by running:

fastboot devices

You should see your device's serial number listed. If not, ensure your drivers are correctly installed.

Phase 1: Userdata Partition Deployment

The `userdata.img` file contains the core Kali Linux installation, including the operating system and essential tools. This phase involves erasing your current user data partition and flashing the Kali `userdata.img` onto it.

Step 1: Erase User Data Partition

This command will wipe your device's internal storage, including apps, settings, and user files. This is a critical step to prepare the partition for the new Kali OS.

fastboot erase userdata

Step 2: Flash Kali Linux Userdata File

Navigate to the directory where you downloaded the Kali Nethunter Pro files. Execute the following command, then drag and drop the `userdata.img` file into your terminal window. The terminal will automatically populate the path to the file. Press Enter to execute the flash operation.

fastboot flash userdata

(Note: The drag-and-drop functionality may vary depending on your terminal emulator. If it doesn't work, you'll need to manually type the full path to the `userdata.img` file after the command.)

This process can take a significant amount of time, depending on the size of the image file and your system's speed. Do not interrupt it.

Phase 2: Boot Image Integration

The `boot.img` file is crucial as it contains the kernel and ramdisk necessary for booting the Kali Linux operating system natively. Flashing this image ensures your device can start the new OS.

Step 1: Flash Kali Linux Boot Image

Similar to the userdata flash, you'll now flash the Kali Nethunter boot image. Execute the command and then drag and drop your `boot.img` file into the terminal window. Press Enter.

fastboot flash boot

(Note: Again, if drag-and-drop fails, manually provide the full path to the `boot.img` file.)

This operation is typically much faster than flashing the userdata partition.

Phase 3: Setting Up Your Mobile Desktop Environment

After successfully flashing the core components, the device will boot into the Kali Nethunter environment. However, for a full desktop experience, some additional configuration is required.

Booting into Kali Nethunter:

Once the flashing is complete, reboot your device using the command:

fastboot reboot

Your device should now boot into the Kali Nethunter interface. This might be a command-line interface initially, or a specific Nethunter interface depending on the build.

Disabling and Enabling Services for Desktop:

To transition to a graphical desktop environment like Phosh (a popular GNOME-based mobile shell), you'll need to manage systemd services. Execute the following commands within your Kali Nethunter terminal:

sudo systemctl disable lightdm
sudo systemctl enable phosh

(Note: `lightdm` is a common display manager, and `phosh` is the target mobile desktop environment. The exact service names might vary slightly based on your specific Nethunter build.)

Installing the Full Kali Linux Desktop Environment (Optional but Recommended):

For the complete Kali experience, including a broad range of desktop applications and tools, install the `kali-linux-nethunter` meta-package. This ensures all essential desktop components and tools are present.

sudo apt update
sudo apt install kali-linux-nethunter

This command will update your package lists and then install the comprehensive Kali Nethunter meta-package, which includes the desktop environment and a vast array of security tools.

Post-Installation Protocols: System Optimization

After the initial boot and configuration, it's crucial to ensure your system is up-to-date and running optimally.

Updating Kali Linux Repositories:

It's essential to synchronize your package manager with the latest software versions and security patches. Run the following command regularly:

sudo apt update && sudo apt full-upgrade -y

This command updates the list of available packages and then installs all available upgrades, including security patches, automatically.

Rebooting the Device:

After significant updates or changes to services, a reboot is often necessary to ensure all changes take effect correctly.

sudo reboot

Ethical Mandate and Disclaimer

Ethical Warning: The techniques and tools discussed herein are intended strictly for educational purposes and for use on systems you own or have explicit, written permission to test. Unauthorized access or testing of computer systems is illegal and unethical, carrying severe legal penalties. Always act responsibly and within the boundaries of the law.

This guide is for educational purposes only. Installing and using Kali Linux on any device, including mobile phones, should only be done with the owner's explicit permission. Unauthorized use of hacking tools or penetration testing on networks you don’t own or have explicit permission to test is illegal and can result in serious consequences. The creator of this content is not responsible for any misuse, damage, or legal repercussions resulting from the installation process or subsequent use of the installed system. Ensure you are fully compliant with all applicable local, national, and international laws and regulations.

The Engineer's Arsenal: Essential Tools

To truly master mobile penetration testing with Kali Nethunter Pro, equip yourself with the right resources:

  • Books: "Penetration Testing: A Hands-On Introduction to Hacking" by Georgia Weidman, "The Hacker Playbook" series by Peter Kim.
  • Software: ADB and Fastboot toolkit, a reliable terminal emulator for Android (e.g., Termux), Virtual Machine software (VirtualBox, VMware) for testing on a PC.
  • Platforms: Official Kali Linux documentation, XDA Developers forums for device-specific information, Hack The Box and TryHackMe for practice labs.

Comparative Analysis: Nethunter Variants

Kali Nethunter isn't a monolithic entity. Understanding the differences between its variants is crucial for selecting the right installation for your needs:

  • Kali Nethunter (Full): This is generally what's installed via custom ROMs or comprehensive guides like this. It aims to provide the most complete Kali experience, often including extensive toolsets and desktop environments.
  • Kali Nethunter Lite: A more stripped-down version designed for devices with limited storage or processing power. It includes core Nethunter functionalities but omits larger desktop environments and extensive tool repositories. Ideal for users focused on specific command-line tools.
  • Kali Nethunter Pro: The version detailed in this guide, often implying a direct, native installation process using standard Android flashing tools like Fastboot, aiming for a seamless integration without requiring a full custom ROM replacement if the device is supported. It focuses on the most direct path to a full Kali OS experience.
  • NetHunter App (via Termux or Root): This is not a full OS installation but an application layer that provides access to Kali tools within an Android environment, often requiring root access or running within a chroot environment managed by Termux. It's the least intrusive but also the least "native."

The choice depends on your device's capabilities, your technical expertise, and the specific tools you intend to use.

The Engineer's Verdict

Native installation of Kali Nethunter Pro on Android represents a significant leap in mobile cybersecurity capabilities. It transforms a ubiquitous device into a powerful, portable security analysis platform. While the process demands technical proficiency and careful adherence to instructions—particularly regarding bootloader unlocking and data wiping—the reward is unparalleled access to a full Linux environment tailored for penetration testing. For the dedicated cybersecurity professional or enthusiast, mastering this installation is a strategic advantage, enabling fieldwork and analysis previously confined to laptops.

Frequently Asked Questions

Q1: Will this work on any Android phone?
No, compatibility is device-specific. You must verify that a Kali Nethunter Pro build exists and is supported for your exact device model. Check resources like XDA Developers.
Q2: Can I revert to my stock Android ROM after installation?
Yes. The standard procedure is to flash your device's original stock ROM or another compatible custom ROM. Ensure you have the correct stock firmware downloaded beforehand.
Q3: Is rooting required for Nethunter Pro installation?
While rooting is often associated with Nethunter, the native installation via Fastboot as described here bypasses the need for a traditional root process on the Android system itself. However, the Nethunter OS runs with root privileges internally.
Q4: What if I encounter a `FAILED (remote: signature verification failed)` error during flashing?
This usually indicates that your bootloader is still locked, or you are trying to flash an image not intended for your specific device model. Double-check your bootloader status and the image file's compatibility.
Q5: Can I use this for Wi-Fi hacking?
Yes, Kali Nethunter is specifically designed to support advanced Wi-Fi capabilities, including monitor mode and packet injection, often requiring compatible external USB Wi-Fi adapters connected via OTG.

About the Author

This dossier was compiled by 'The Cha0smagick,' a veteran digital operative and polymath engineer. With years spent navigating the complexities of secure systems and digital frontiers, The Cha0smagick specializes in deconstructing intricate technological challenges and forging actionable intelligence. This document represents a distillation of field-tested knowledge, designed to empower fellow operatives in the digital realm.

Mission Debrief: Your Next Steps

You've now received the comprehensive intel required to install Kali Nethunter Pro natively on your Android device. This is not merely an installation; it's an upgrade to your operational capabilities.

Your Mission: Execute, Share, and Debate

If this blueprint has provided you with the clarity and confidence to undertake this complex operation, share it within your professional network. Knowledge is a force multiplier, and this intelligence is designed to be deployed.

Should you encounter any technical challenges or discover optimizations not covered here, contribute your findings to the discussion below. Every operative's debriefing adds value to our collective intelligence.

What specific penetration testing tasks are you most eager to perform with your new mobile Kali setup? Share your objectives in the comments.

Debriefing Session Commences Now. Post your findings, questions, and mission reports below.

Further Exploration & Monetization:

As you delve deeper into the world of digital assets and decentralized technologies, understanding secure platforms for trading and managing your investments is crucial. For robust security and a wide range of trading options, consider opening an account with Binance and exploring the cryptocurrency ecosystem.

Related Dossiers:

  • Android Security Hardening Techniques
  • Essential Ethical Hacking Tools Explained
  • Mastering the Linux Command Line for Security Pros
  • Advanced Penetration Testing Methodologies
  • Understanding Zero Trust Architecture
  • Introduction to Mobile Forensics
  • Custom ROM Development and Flashing Guide

Trade on Binance: Sign up for Binance today!

Parrot OS on Android: A Deep Dive into Mobile Penetration Testing Distributions

The digital frontier is constantly shifting, and the battleground isn't confined to your desktop anymore. Today, we're dissecting a specific tactic: deploying powerful Linux distributions like Parrot OS onto Android devices without the need for root access. This isn't about illicit gains in the shadows; it's about understanding the anatomy of mobile security and exploring the tools available for ethical defenders and researchers. The aim is to equip you with the knowledge to analyze, test, and ultimately strengthen mobile environments, not to compromise them. Remember, all actions outlined here are for educational purposes and should only be performed on systems you own or have express authorization to test.

In this deep dive, we'll explore the technical underpinnings, potential use cases for security professionals, and the critical defensive considerations when operating specialized operating systems on mobile platforms. We'll guide you through the methodologies, highlight the risks, and position this technique within the framework of legitimate security assessments.

Understanding the "No Root" Paradigm in Mobile Security

Historically, deep system-level access on Android required root privileges. This unlocked the ability to modify core system files, install custom kernels, and run applications with elevated permissions. However, the security landscape is evolving, and application-level virtualization and containerization technologies have opened new avenues.

Running a Linux distribution like Parrot OS on Android without root typically involves leveraging tools that create isolated environments. These applications essentially simulate a Linux system within the Android OS, allowing you to run Linux binaries and tools without altering the host system's integrity. This approach offers a compelling balance between functionality and security, as it minimizes the risk of bricking your device or creating exploitable vulnerabilities in the Android kernel itself.

Parrot OS: A Mobile Pentester's Toolkit

Parrot OS is a Debian-based Linux distribution designed for penetration testing and digital forensics. It comes pre-loaded with a comprehensive suite of security tools, making it a popular choice for ethical hackers. When deployed on an Android device, it transforms your mobile phone or tablet into a portable security analysis workstation.

Imagine conducting network reconnaissance, analyzing Wi-Fi traffic, or even performing vulnerability scans directly from your pocket. This mobility offers unparalleled flexibility for researchers who need to assess environments on the go. Tools commonly found in Parrot OS, such as Nmap, Wireshark, Metasploit Framework, Aircrack-ng suite, and various web application testing tools, become accessible in a familiar Linux environment on your Android device.

Technical Implementation: A Strategic Overview

The core of running Parrot OS on Android without root lies in specific applications that facilitate this process. While specific app names and methods can change with OS updates and new developments, the general approach involves:

  • Termux: Often, Termux serves as the foundational environment. It's a powerful terminal emulator and Linux environment app for Android that works directly without root. Through Termux, users can install a wide range of Linux packages.
  • Proot/Chroot Environments: More advanced techniques involve using `proot` (a user-space implementation of `chroot`, `mount --bind`, and `binfmt_misc`) or similar technologies to create an isolated filesystem that mimics a full Linux distribution within Termux. This allows for the installation and execution of Parrot OS components.
  • Custom Scripts and Repositories: Community-driven projects and scripts often automate the process of downloading, configuring, and setting up Parrot OS within the Termux environment. These are crucial for abstracting the complex steps involved.

It's crucial to understand that "installing" Parrot OS this way is not the same as a native dual-boot or a full OS replacement. It's a robust emulation and isolation technique.

Defensive Considerations and Ethical Imperatives

While the ability to run Parrot OS on Android without root is technically fascinating and operationally useful for security professionals, it's paramount to address the defensive and ethical implications:

  • Attack Surface Management: Running a full pentesting distribution on your daily driver device significantly expands its attack surface. Any misconfiguration or vulnerability within the Linux environment or the underlying Android applications could potentially be exploited.
  • Data Security: Sensitive data, credentials, and findings from security assessments are now residing on your mobile device. Robust data encryption, secure password management, and strict access controls are non-negotiable.
  • Malware and Tool Misuse: The same tools that enable ethical hacking can be used maliciously. Ensuring that the scripts and repositories you use are from trusted sources is critical to avoid introducing malware onto your device. Furthermore, understanding the legal and ethical boundaries of where and how these tools are used is fundamental.
  • Device Performance and Battery Life: Running resource-intensive Linux applications can heavily impact your Android device's performance and significantly drain its battery.

As security professionals, our role is to fortify systems, not to weaken them. This technique should be employed with the utmost responsibility, adhering to strict ethical guidelines and legal frameworks.

Arsenal of the Mobile Operator/Analyst

For those venturing into mobile security assessments, having the right tools is key. While Parrot OS offers a broad spectrum, consider these indispensable components:

  • Termux: The cornerstone for running Linux environments on Android without root.
  • NetHunter (for rooted devices): While this guide focuses on no-root, for advanced scenarios where full control is necessary and authorized, Kali NetHunter offers a comprehensive solution for devices with root access.
  • VNC Viewer/XServer XSDL: To run graphical applications from your emulated Linux distribution.
  • Secure Storage Solutions: Apps like VeraCrypt or encrypted cloud storage for safeguarding assessment findings.
  • VPN Services: To anonymize your traffic and secure your connection during assessments.
  • Mobile VPN Clients: Such as OpenVPN Connect or WireGuard clients for seamless VPN integration.
  • Password Managers: Keep your credentials secure and organized.

Veredicto del Ingeniero: Un Compromiso Estratégico

Deploying Parrot OS on Android without root is a technically ingenious solution for mobile security professionals seeking on-the-go analysis capabilities. It offers a powerful, portable toolkit that bypasses the need for traditional rooting, mitigating some but not all risks associated with system modification.

Pros:

  • Portability: A powerful pentesting environment in your pocket.
  • No Root Required: Avoids the security implications and warranty voiding of rooting.
  • Comprehensive Toolset: Access to a vast array of security tools.
  • Isolation: The Linux environment is generally isolated from the core Android system.

Contras:

  • Performance Limitations: May strain device resources, impacting speed and battery.
  • Complexity: Setup can be complex and requires understanding of Linux and Android internals.
  • Expanded Attack Surface: Introduces new potential vulnerabilities.
  • Limited Hardware Access: Certain hardware functionalities might not be fully accessible without root.

Decision: For experienced security professionals who understand the risks and have specific use cases for mobile-based assessments, this is a valuable technique. However, it should not be treated as a replacement for a dedicated, professional-grade penetration testing setup. It's an **enhancement**, a **strategic compromise**, not a silver bullet. Ensure you are using it ethically, legally, and with robust security practices in place.

F.A.Q.

Can I run Parrot OS on any Android device?

Generally, yes, provided the device has sufficient processing power and RAM. The complexity of the setup might vary depending on the Android version and device manufacturer.

Is it legal to use penetration testing tools on my Android device?

Using penetration testing tools on your own devices for security testing is legal. However, using these tools on devices or networks you do not own or have explicit permission to test is illegal and unethical.

Will this void my device's warranty?

Typically, no. Since this method does not require root access, it generally does not void your device's warranty, unlike traditional rooting procedures.

How do I keep my Parrot OS installation secure?

Regularly update both Termux packages and your Linux distribution. Use strong passwords, consider enabling a firewall within the Linux environment, and be cautious about the scripts you execute.

El Contrato: Tu Kit de Evaluación Móvil

Your contract is clear: leverage the power of Parrot OS on Android for ethical security assessments, but do so with discipline and foresight. Today, you've learned how to technically achieve this and, more importantly, the defensive posture required. Your challenge now is to set up a basic mobile assessment kit.

The Challenge:

  1. Install Termux on your Android device.
  2. Research and identify a reliable community script or guide for installing Parrot OS within Termux (referencing trusted sources like GitHub).
  3. Execute the installation steps according to the chosen guide.
  4. Once Parrot OS is running, use `nmap` (provided by the installation) to scan your own local Wi-Fi network.
  5. Document the process, noting any challenges encountered and how you overcame them.

Share your findings, the scripts you used, and any performance observations in the comments below. Let's build a collective knowledge base for mobile security operations.

Turning Your Android Device into a Tactical Hacking Platform Without Root Access

The glow of the screen is your only companion in this digital alley. You're hunting ghosts in the machine, whispers of compromised systems echoing in the logs. Today, we're not just patching; we're dissecting the very essence of a threat, turning a common device into a reconnaissance or analysis tool. Forget the heavy rigs; the battlefield can be in your pocket. This isn't about breaking doors; it's about understanding how they can be breached, so you can reinforce them. We're talking about transforming your Android phone into a portable command center, a tool for ethical exploration and defense, all without needing administrative privileges – no root required.

Anatomy of a Mobile Attack Vector: The Kali Linux on Android Scenario

The allure of running a full-fledged penetration testing distribution like Kali Linux on a mobile device is undeniable. It promises portability, accessibility, and a powerful suite of tools at your fingertips. While the original content hints at a straightforward installation, understanding the underlying mechanisms is crucial for any security professional. The core idea is to leverage containerization or chroot environments to run a Linux distribution within the Android OS. This approach bypasses the need for deep system modification (rooting), which can introduce security risks and void warranties. However, it also comes with performance limitations and potential isolation challenges.

This isn't about performing clandestine operations from a dimly lit room, but about a practitioner's ability to analyze, test, and understand network vulnerabilities from any location. It’s about having a controlled environment for learning and practice. The tools mentioned in the original context, such as UserLAnd, JuiceSSH, and ConnectBot, are essential components in this strategy. UserLAnd, for instance, acts as a bridge, allowing you to run Linux distributions and applications directly on your Android device without requiring root. It simplifies the process of setting up environments like Kali Linux, Debian, or Ubuntu through its user-friendly interface.

The Blue Team's Perspective: Understanding the Tool, Not Just the Tradecraft

From a defensive standpoint, understanding how such a setup is achieved is key. It’s not about enabling malicious actors, but about recognizing the potential for misuse and, more importantly, understanding the attack surface that such an environment might present. If an organization's devices are compromised, could they be turned into similar platforms for lateral movement or data exfiltration? Or, more constructively, how can security analysts leverage mobile platforms for incident response or on-the-go threat hunting?

The process typically involves:

  1. Environment Setup: Utilizing an app like UserLAnd to create a Linux user-space environment.
  2. Distribution Installation: Downloading and configuring a Linux distribution (e.g., Kali Linux) within that environment. This often involves setting up VNC or SSH servers.
  3. Remote Access: Employing SSH clients (like JuiceSSH or ConnectBot) to connect to the Linux environment running on the phone.
  4. Tool Utilization: Accessing and running penetration testing tools within the Linux environment.

While this method offers convenience, it's essential to acknowledge the trade-offs. Performance can be significantly impacted by the phone's hardware. Furthermore, the isolation between the Android OS and the Linux environment might not be as robust as a dedicated virtual machine or a physical machine, potentially posing security risks if not managed carefully.

Arsenal of the Mobile Operator/Analyst

  • Environment Manager: UserLAnd (Essential for non-root Linux on Android)
  • SSH Clients: JuiceSSH (Advanced features for Android 9.0+), ConnectBot (Standard SSH support)
  • Virtual Environment Tools: Termux (Another powerful option for a Linux-like environment on Android, though it has its own package management system)
  • Mobile Security Framework (MobSF): For on-device static and dynamic analysis of Android applications.
  • Network Scanners (limited): Tools like Nmap can be used, but performance will heavily depend on device capabilities.
  • Password Cracking Tools (CPU-bound): Tools like John the Ripper can be run, but expect slow performance.
  • Decent Smartphone: A device with ample RAM (6GB+) and a capable processor is highly recommended for a usable experience.

Veredicto del Ingeniero: Mobility vs. Security Rigor

Turning your Android phone into a hacking machine without root is a testament to the adaptability of modern mobile operating systems and the ingenuity of the tools developed around them. For educational purposes, bug bounty hunting on specific targets, or quick network assessments in a controlled environment, it's a viable and accessible option. The convenience and low barrier to entry are significant advantages.

However, for serious, enterprise-level penetration testing or red teaming operations, relying solely on a mobile device has limitations. Performance bottlenecks, potential stability issues, and the inherent security considerations of running complex tools within a partially isolated environment mean it's unlikely to replace a dedicated laptop or workstation. It's a powerful auxiliary tool, an extension of your capabilities, but not a complete replacement for your primary toolkit.

Taller Defensivo: Securing the Perimeter of Your Mobile Linux Environment

If you choose to set up a Linux environment on your Android device, even without root, securing it becomes paramount. An attacker gaining access to this environment could potentially pivot to other networks or use it as a compromised device to launch attacks. Here’s a basic hardening approach:

  1. Strong Authentication:

    • Use SSH Keys: Instead of relying solely on passwords for SSH access to your Linux environment, generate and use SSH key pairs. This significantly enhances security.
    • Secure User Passwords: If you must use passwords, ensure they are strong, complex, and unique.
  2. Minimize Attack Surface:

    • Install Only Necessary Tools: Avoid installing a full Kali Linux image if you only need specific utilities. Consider more lightweight distributions or targeted installations.
    • Disable Unused Services: Turn off any services within the Linux environment that are not actively being used.
  3. Network Isolation (where possible):
    • Understand App Permissions: Be aware of the permissions UserLAnd or similar apps require and how they interact with your Android OS.
    • Use Mobile Data Cautiously: Avoid connecting your mobile Linux environment to untrusted Wi-Fi networks. Prefer cellular data or trusted Wi-Fi hotspots.

  4. Regular Updates:
    • Keep both your Android OS and the Linux distribution within your chosen app up-to-date with the latest security patches.

Preguntas Frecuentes

¿Es seguro ejecutar Kali Linux en Android sin root?
Es más seguro que con root, ya que el acceso al sistema Android subyacente está limitado. Sin embargo, la seguridad depende de las prácticas de configuración, la robustez de la aplicación de virtualización (como UserLAnd) y las herramientas utilizadas. Siempre existe un riesgo inherente.
¿Puedo usar estas herramientas para actividades ilegales?
Este contenido se proporciona con fines educativos y de seguridad ética. El uso de estas herramientas para actividades ilegales está estrictamente prohibido y puede tener graves consecuencias legales. Siempre opera dentro de los límites de la ley y con autorización explícita.
¿Qué rendimiento puedo esperar?
El rendimiento varía enormemente según el hardware de tu dispositivo. Los teléfonos más potentes con más RAM ofrecerán una experiencia mucho más fluida. Las tareas intensivas en CPU o memoria pueden ser lentas.
¿Existen alternativas a UserLAnd?
Sí, Termux es una alternativa popular que proporciona un entorno de línea de comandos de Linux en Android. También existen otras aplicaciones que utilizan chroot o contenedores, pero UserLAnd es conocido por su facilidad de uso para instalar distribuciones completas.

El Contrato: Fortaleciendo Tu Postura de Defensa Móvil

Ahora que entiendes cómo un atacante puede considerar tu dispositivo móvil como un punto de entrada o un vector de ataque, y cómo puedes usarlo como una herramienta para el bien, el contrato es claro: la conciencia es la primera línea de defensa. Considera tu propio dispositivo. ¿Está habilitado para ser una herramienta de análisis o una puerta trasera involuntaria? Implementa al menos una de las medidas de seguridad de la sección "Taller Defensivo" en las próximas 48 horas. Comienza por asegurar el acceso a tu entorno móvil de Linux o, si aún no tienes uno, investiga cómo podrías configurarlo de forma segura para fines educativos.

La red es un campo de juego polvoriento, y tu dispositivo móvil podría ser tu arma secreta o tu talón de Aquiles. ¿Cuál será? El conocimiento te da el poder de elegir. Ahora, demuestra que lo has entendido. ¿Qué herramienta o técnica discutida aquí te parece más valiosa para tu personal de respuesta a incidentes en movimiento, y por qué?

Next-Level Ubuntu Desktop on Android: A Deep Dive into Mobile Linux Architectures and Defenses

The digital frontier is a constantly shifting landscape. Today, we’re not just looking at a mobile device; we’re dissecting its potential as a full-fledged Linux workstation. The allure isn't just convenience; it's about unlocking powerful development and analysis tools on a platform that’s always in your pocket. But as with any deployment, especially one operating outside its native habitat, understanding the attack surface and implementing robust defenses is paramount. This deep dive explores the architectural nuances and security implications of running a full Ubuntu desktop environment on Android, without resorting to root access. We’ll analyze the methodologies, the tools, and crucially, how to secure such a setup against emerging threats.

"The greatest security vulnerability is the one you don't know exists. On a mobile device running a desktop OS, that list can be extensive."

Table of Contents

Unpacking the "No Root" Paradigm

The promise of a "full Ubuntu Desktop on Android without root" is a powerful one. It suggests accessibility and broad applicability. At its core, this often leverages tools like Termux, a powerful terminal emulator and Linux environment for Android. Termux allows users to install a vast array of Linux packages, including command-line tools and even graphical environments, all within a sandboxed application. This confinement is the key to the "no root" aspect. By operating within the Android application sandbox, these Linux environments avoid the need for elevated system privileges. However, this sandboxing also defines the boundaries of our security posture. While it inherently limits the potential damage an attacker could inflict if they compromise the Linux environment, it also introduces new vectors for exploitation that are specific to inter-app communication and Android's permission model.

Architectural Overview: Termux and Beyond

Termux acts as the foundation for many such setups. It emulates a Linux environment, providing access to a package manager (like APT) and a vast repository of FOSS (Free and Open Source Software). To achieve a desktop-like experience, users often integrate specific X server applications for Android, which then display the Linux GUI. This architecture is fundamentally different from dual-booting or native Linux installations on phones. It relies on Android's core functionalities and APIs. Understanding this layered approach is critical for both deploying such systems and for assessing their security. An attacker might not be targeting Ubuntu directly, but rather the Android permissions granted to the X server or Termux, or the vulnerabilities in the communication channels between them. It’s a chain of trust, and every link is a potential breaking point.

The source of inspiration for this setup can be traced to projects aiming to democratize access to powerful computing environments. For a deeper understanding of how such integrations are achieved, exploring the underlying YouTube video and its related content provides valuable insights into the practical implementation: Original Source Analysis.

When considering advanced mobile deployments, knowledge of containerization technologies is invaluable. For those interested in exploring these concepts further, resources on Docker and LXC are highly relevant, though direct application on Android without root is limited. Understanding these parallels, however, helps in grasping the isolation principles at play.

The Software Ecosystem: Development and Analysis Tools

The true power of running Ubuntu on Android, as highlighted in the original content, lies in the software you can deploy. Visual Studio Code (VSCode) is frequently cited for its powerful code editing capabilities. Access to VLC media player speaks to the versatility of the setup, moving beyond pure development. This opens doors for tasks such as:

  • Code Development: Compiling and running scripts, developing applications, and managing code repositories directly on your mobile device.
  • Data Analysis: Utilizing Python with libraries like Pandas and NumPy, or R, for scripting and analysis.
  • Penetration Testing: Employing command-line tools for network scanning, vulnerability assessment, and forensic analysis (within ethical and legal boundaries).
  • System Administration: Managing remote servers via SSH or performing local system tasks with familiar Linux utilities.

The ability to run tools like VSCode on Android is a game-changer for mobile professionals. For a detailed guide on achieving this specific integration, the following resource is highly recommended: VSCode on Android Installation.

Security Considerations: An Attacker's Perspective

From an offensive standpoint, a mobile device running a full Linux desktop presents a multifaceted target. While the "no root" approach mitigates some risks by confining the Linux environment, it introduces others.

  • Android Permission Exploitation: Any vulnerability in how Termux or the X server application interacts with Android's permission system could allow privilege escalation or unauthorized data access.
  • Inter-App Communication Exploits: If the Linux environment needs to interact with other Android apps or services, the communication channels can be targets for interception or manipulation.
  • Data Storage Vulnerabilities: Sensitive data, such as API keys, credentials, or proprietary code, stored within the Linux environment on the device's internal storage is vulnerable if the device itself is compromised or if the storage is accessed improperly by malicious apps.
  • Network Exposure: Running desktop applications, especially servers or services, can expose network ports. If not properly firewalled, these can become entry points for attackers. Default configurations are rarely secure.
  • Outdated Software: Just like any Linux distribution, packages within Termux can have vulnerabilities. Without regular patching and updating, the system becomes susceptible to known exploits.

Think of it this way: an attacker sees not just an Ubuntu system, but an Android device *hosting* an Ubuntu system. They will exploit the weakest link in that chain.

Defense Strategies: Fortifying Your Mobile Workstation

Securing a mobile Linux environment requires a layered approach, addressing both the Android host and the Linux guest.

  1. Principle of Least Privilege: Grant Termux and any associated X server applications only the absolute minimum permissions required for their operation. Regularly review these permissions.
  2. Robust Password Policies: If you set up any services or user accounts within the Linux environment, use strong, unique passwords. Consider SSH key-based authentication for remote access.
  3. Regular Updates: Treat your Termux environment like any other Linux system. Regularly run `apt update && apt upgrade` to patch known vulnerabilities.
  4. Network Segmentation and Firewalls: If you expose any services, ensure they are behind a firewall. Understand how Android's networking interacts with the Linux environment to prevent unintended exposure. Use tools like `iptables` within Termux for granular control.
  5. Data Encryption: Ensure your Android device’s storage is encrypted. For highly sensitive data within the Linux environment, consider encrypting specific directories or files.
  6. Sandboxing Awareness: Understand the limits of Termux's sandbox. Do not store critical secrets or perform highly sensitive operations if the risk of data exfiltration from the sandbox is unacceptable.
  7. Code and Tool Auditing: Be cautious about the scripts and tools you download and run within the Linux environment. Audit them for malicious intent, especially if they come from untrusted sources.

"Never trust, always verify. This mantra is tenfold more critical when you're blurring the lines between mobile and desktop operating systems."

Engineer's Verdict: Viability and Risks

Running Ubuntu on Android without root, primarily via Termux, is a technically impressive feat that offers significant utility for developers, sysadmins, and security professionals on the go. The flexibility it provides for running familiar Linux tools on a portable device is undeniable. However, this convenience comes with inherent risks. The "no root" approach, while simplifying deployment, means that the security of the setup is heavily reliant on the security of the Android OS and the specific applications used to host the Linux environment. Exploits targeting Android's permissions, inter-app communication, or the underlying kernel can bypass the intended isolation. For casual use or development tasks that don't involve highly sensitive data or critical infrastructure, it's a viable and powerful option. For enterprise-level security operations or handling extremely sensitive information, the risks associated with the layered architecture and the mobile platform's inherent security model might outweigh the benefits, unless meticulously secured and continuously monitored.

Operator's Arsenal: Essential Tools and Knowledge

To effectively deploy and secure such a mobile workstation, a curated set of tools and knowledge is essential:

  • Core Tools: Termux (obviously), an X server app (e.g., XServer XSDL), SSH client/server tools, Git for version control.
  • Development Environment: Visual Studio Code (via Termux or appropriate Android integrations), Python, Node.js, Go, and any language-specific compilers/interpreters.
  • Analysis & Pentesting Suite (Command-Line): Nmap, Wireshark (TShark), Metasploit Framework (use with extreme caution and ethical discretion), tcpdump, Foremost, Volatility (if analyzing memory dumps from a compatible system).
  • System Monitoring: htop, glances, `journalctl` (if applicable within the Termux environment), and Android's built-in battery/resource monitoring.
  • Essential Reading: "The Hacker Playbook" series for offensive tactics, "The Web Application Hacker's Handbook" for web-focused security, and official documentation for Termux and any X server applications.
  • Certifications: While not directly applicable to the mobile setup itself, foundational certifications like CompTIA Security+, Network+, or specialized certs in Linux administration (e.g., LPIC, RHCSA) bolster the operator's understanding of the underlying principles. For those delving into offensive security, the OSCP remains a benchmark.

Frequently Asked Questions

Q1: Can I run any Ubuntu Desktop application on Android without root?

A1: You can run many command-line applications and a good selection of GUI applications that are compatible with the X Window System. However, applications requiring deep system access or specific hardware integrations might not function correctly or at all.

Q2: Is this setup secure enough for sensitive work?

A2: It depends on the sensitivity and your defense posture. While Termux is sandboxed, the overall security relies on Android's security, your app permissions, and your diligent configuration and maintenance. It's generally not recommended for handling highly sensitive proprietary data or critical infrastructure management without significant additional security measures.

Q3: How do I update the Ubuntu environment within Termux?

A3: You typically use the APT package manager: run `pkg update && pkg upgrade` in the Termux terminal. Some environments might require specific update procedures.

Q4: What are the main risks of running desktop Linux on Android?

A4: Key risks include Android permission exploitation, vulnerable inter-app communication, data exposure if the device is compromised, insecure network services, and vulnerabilities in outdated Linux packages.

Conclusion: The Evolving Mobile Threat Landscape

The ability to run a full Ubuntu desktop on an Android device without root represents a significant shift in mobile computing capabilities. It transforms smartphones and tablets into powerful, portable workstations. From development with VSCode to potential, albeit cautious, security analysis, the possibilities are expanding. However, this architectural convergence demands a heightened awareness of security. Understanding the attack surface, from Android permissions to the Linux application layer, is not optional; it's a prerequisite for secure deployment. As these mobile computing paradigms evolve, so too must our defensive strategies. The lines between device types are blurring, creating new opportunities for both innovation and exploitation. Staying informed, maintaining vigilance, and implementing robust security practices are the only currency that truly matters in this dynamic digital realm.

The Contract: Fortify Your Mobile Command Center

Your mission, should you choose to accept it, is to take the principles discussed and apply them to your own mobile setup. If you've experimented with running Linux on Android, detail in the comments: What specific security measures have you implemented to protect your mobile Linux environment? What tools do you find indispensable for both productivity and security on this platform? Share your knowledge; let's build a collective defense against the shadows lurking in the digital ether.

Mastering Termux: Transforming Your Android Device into a macOS-Like Powerhouse for Security Analysis

The glow of the terminal screen is your only ally in the dead of night. On the streets of the digital underworld, a compromised mobile device can be both a liability and a powerful reconnaissance tool. Termux, a terminal emulator for Android, is a clandestine operative's best friend. But why settle for a utilitarian interface when you can mold it into something that whispers of sophistication and power? Today, we're not just installing a desktop environment; we're performing an aesthetic hack, a digital makeover that blends raw power with a familiar, elegant facade. We're making Termux look like macOS.

Forget the limitations of standard command-line interfaces. This isn't about flashy looks; it's about enhancing your operational efficiency and cognitive flow. By emulating a known, intuitive GUI like macOS, you streamline your workflow, reduce cognitive load, and potentially spot anomalies faster. The goal is an immersive security analysis environment, right in your pocket. We'll be leveraging the XFCE desktop environment for this critical operation, but the principles are transferable. Think of this as your initial penetration test into a more refined mobile security setup.

Table of Contents

The Operator's Mandate: Why Customize Termux?

In the realm of cybersecurity, the tools we use are extensions of our will. Termux offers a robust Linux environment on Android, a canvas for running security tools remotely or directly. However, its default appearance can be... uninspiring. For an analyst who spends hours staring into the abyss of logs and network traffic, a visually appealing and familiar interface can be more than just aesthetics; it can be a performance enhancer. Emulating macOS provides a standardized, clean, and highly functional desktop experience. This isn't about vanity; it's about building a tactical advantage by optimizing your immediate operating environment. A clean interface reduces distractions, making it easier to focus on critical security tasks, from threat hunting to bug bounty reconnaissance.

"The interface is the weapon. A clumsy interface is a blunt tool; a well-crafted one is a surgical scalpel." - Anonymous Security Architect

This process essentially involves installing a lightweight desktop environment (XFCE) and then applying themes, icons, and cursors that mimic the macOS look and feel. It’s a form of social engineering on your own device, making it more comfortable and productive. For those operating in environments where a full laptop isn’t feasible, or for quick on-the-go analyses, a customized Termux can be a game-changer. It bridges the gap between mobile convenience and desktop power.

Phase 1: Establishing the Command Post (Installation)

First, ensure you have Termux installed from a trusted source, preferably F-Droid, as the Google Play Store version is outdated. Once Termux is up and running, we need to update our package lists and upgrade existing packages to their latest versions. This is standard procedure before installing any new software to avoid conflicts and leverage the most stable code.

pkg update && pkg upgrade -y

Next, we install essential components for graphical environments. This includes `proot-distro` for managing Linux distributions within Termux, and `x11-repo` which provides access to X11 server packages. We also install `termux-api` for better integration with the Android system.

pkg install proot-distro x11-repo termux-api -y

Now, we need to install a Linux distribution to host our desktop environment. Ubuntu is a solid choice for its widespread compatibility and ease of use. We'll use `proot-distro` to install and set it up.

proot-distro install ubuntu
proot-distro login ubuntu

Once inside the Ubuntu distribution, we update its package lists and install the XFCE desktop environment, along with a VNC server to access the graphical session remotely.

apt update && apt upgrade -y
apt install xfce4 xfce4-goodies dbus-x11 tigervnc-standalone-server -y

After installation, we need to configure VNC. Set a password for your VNC session. This password will be used to connect to your graphical desktop.

vncserver-xmax
# You will be prompted to set a password. Choose a strong one.

You can start the VNC server with:

vncserver-xmax :1 -geometry 1280x720 -depth 24

The `:1` indicates the display number, and `-geometry` sets the resolution. Choose a resolution that fits your device screen comfortably.

Phase 2: The Aesthetic Infiltration (macOS Customization)

With the XFCE desktop running via VNC, it's time for the cosmetic surgery. We'll download the necessary theme files, icons, cursors, and menu elements to replicate the macOS look. These elements are crucial for transforming the generic Linux desktop into a convincing macOS facade.

You can download these assets using `wget` or `curl` within Termux. Make sure you are in the appropriate directory within your Ubuntu environment (e.g., your home directory).

  • Theme: https://ift.tt/CsyY0aT
  • Icons: https://ift.tt/17mGI8y
  • Cursors: https://ift.tt/R6VA2ns
  • xApple Menu: https://ift.tt/N2x4Y15
  • Other Required Files: https://ift.tt/E7R5k9S (credit: @Linux Scoop)

Once downloaded, you'll need to extract these archives and place the files in the correct locations within your XFCE configuration directories. This typically involves placing theme files in ~/.themes, icon themes in ~/.icons, and cursors similarly.

Navigate to your XFCE settings manager within the VNC session. You'll find options to change the Window Manager theme, Style (GTK theme), Icons, and Mouse Cursors. Carefully select the downloaded macOS-like elements for each category.

For the dock and menu bar, you might need to install additional XFCE plugins or third-party applications like Plank or Cairo-Dock, configured to mimic the macOS dock and menu structure. The `xApple-Menu` component is specifically designed to replace the default XFCE application menu with something resembling the macOS Spotlight or Launchpad. Implementing these requires attention to detail, much like crafting a sophisticated exploit.

Phase 3: Equipping the Operative (Tools and Workflow)

A visually appealing interface is useless without the right tools. Now that your Termux environment looks the part, it's time to populate it with security-focused applications. This is where the true value lies.

Within your Ubuntu Proot environment, you can install a vast array of security tools using apt.

# Example: Installing Nmap, Wireshark (tshark), and Metasploit Framework
apt install nmap wireshark tshark metasploit-framework -y
# For Python-based tools, ensure pip is installed and use it
apt install python3 python3-pip -y
pip3 install requests beautifulsoup4

Consider tools like:

  • Network Scanners: Nmap, Masscan
  • Vulnerability Scanners: Nikto, OpenVAS (requires significant setup)
  • Web Proxies: Burp Suite (Community Edition), OWASP ZAP
  • Password Cracking: John the Ripper, Hashcat (GPU support is complex on Android)
  • Forensics Tools: Autopsy (requires more powerful hardware/VM)
  • Exploitation Frameworks: Metasploit Framework

The key is to integrate these tools seamlessly into your customized desktop. You can create application launchers within XFCE for your most-used scripts and tools. For instance, create a launcher that starts a specific Nmap scan or initiates a VNC connection to a target.

Remember, the efficiency of your workflow directly impacts your effectiveness. A well-organized, visually intuitive environment allows for quicker analysis and reaction times, crucial in high-stakes security operations.

Engineer's Verdict: Is This Tactical or Trivial?

Transforming Termux into a macOS-like environment is a fascinating blend of functional enhancement and aesthetic engineering. While some might dismiss it as mere cosmetic change, the benefits for a security operator are tangible. Reducing the learning curve for new users, minimizing cognitive friction for experienced analysts by providing a familiar workspace, and improving overall situational awareness through a cleaner interface are significant advantages. It’s about making your tools work *for* you, not against you. However, it's crucial to remember that this is a lightweight desktop environment. For computationally intensive tasks like deep packet analysis or heavy brute-forcing, dedicated hardware or cloud-based solutions remain superior. This customization is best suited for reconnaissance, scripting, on-the-go analysis, and learning.

The Operator's Arsenal

To execute operations like the one detailed above, a seasoned operative requires a well-curated toolkit. Here are the essentials:

  • Terminal Emulator: Termux (from F-Droid)
  • Linux Distribution Manager: proot-distro
  • Desktop Environment: XFCE
  • Remote Access: Tigervnc-standalone-server
  • Customization Assets: macOS themes, icon packs, cursors
  • Core Security Tools: Nmap, Metasploit Framework, Burp Suite Community Edition, Wireshark/tshark, John the Ripper.
  • Scripting Languages: Python 3 (with pip)
  • Configuration Management: Text editors (nano, vim), shell scripting knowledge.
  • Learning Resources: Security blogs, documentation, tutorials (like this one).
  • Hardware: A capable Android device with sufficient storage and RAM.

For deeper dives into exploitation, consider investing in certifications like the OSCP, which offer hands-on experience with advanced techniques. The Web Application Hacker's Handbook remains a foundational text for web security specialists.

Frequently Asked Questions

Q1: Will this make my Android device run slower?
A: Running a VNC server and desktop environment does consume resources. However, XFCE is one of the lightest desktop environments available, minimizing the performance impact compared to heavier options like GNOME or KDE. Performance will vary based on your device's specifications.

Q2: Is it possible to install other desktop environments like KDE or GNOME?
A: Yes, it is technically possible, but highly discouraged due to resource constraints on most Android devices. These environments are much heavier and will likely lead to a sluggish and unstable experience.

Q3: Can I use this for actual penetration testing in the field?
A: Yes, with caution. Termux coupled with security tools can be highly effective for reconnaissance, initial access attempts, and post-exploitation tasks. However, always ensure you have explicit permission before conducting any security testing on systems you do not own or manage.

Q4: Where can I find more advanced Termux customization guides?
A: Look for communities on Reddit (r/termux), specialized forums, and YouTube channels that focus on Termux and Linux on Android. The source mentioned in the original post, @Linux Scoop, is a good starting point.

The Contract: Your Next Move

You've now seen how to transform Termux from a simple terminal into a visually sophisticated environment mirroring macOS. This isn't just about looks; it's about optimizing your operational efficiency. The next step is to operationalize this setup. Choose three of your most frequently used security tools and create custom launchers within your new XFCE environment. Document the process. What challenges did you encounter? How did the new interface affect your workflow during a simulated reconnaissance task?

Now, put your knowledge to the test. Configure your Termux XFCE desktop with the macOS theme. Install Nmap and create a launcher to scan a local network segment. Report your findings and any custom launchers you've created in the comments below. The digital battlefield is constantly evolving; adapt or become obsolete.

The Ultimate Guide to Mastering Tmux in Termux: Your Mobile Command Center

The glow of the screen, a stark contrast to the encroaching night. Each line of code, a whisper in the digital wind. You’re not just using a terminal; you're orchestrating a symphony of commands from the palm of your hand. In the shadows of the mobile OS, a potent tool awaits: Termux. And within Termux, a true power-up: Tmux. This isn't about casual browsing; it's about reclaiming the command line, wherever you are. Today, we dissect Tmux within the Termux environment, transforming your phone into a portable security operations center.

This guide isn't for the faint of heart, nor for those content with tapping icons. We’re diving deep into the mechanics of terminal multiplexing, a skill that separates the script kiddies from the seasoned operators. Tmux is more than just splitting screens; it’s about managing complex workflows, maintaining persistent sessions, and orchestrating tasks with ruthless efficiency, all from a device that fits in your pocket. Think of it: recon, analysis, exploitation, all while sipping coffee on a park bench. The digital battlefield is mobile, and your arsenal must be too. Forget clumsy multi-app switching; Tmux consolidates your operations into a single, powerful window.

Table of Contents

What is Tmux and Why Termux?

Tmux, short for Terminal Multiplexer, is a window management system for the command-line interface. It allows users to create multiple terminal sessions, detach from them, and reattach later. This is invaluable for sysadmins, developers, and security professionals who need to run long-running processes or manage multiple tasks simultaneously. Tmux supports features like:

  • Multiple Windows: Think of these as different tabs in a browser, each capable of holding multiple panes.
  • Multiple Panes: Split a single window into multiple resizable sections to view different outputs or run different commands side-by-side.
  • Session Persistence: Your processes continue running even if you close the Termux app or lose your connection. Reattach to your session later, exactly where you left off.
  • Customizable Keybindings: Tailor Tmux to your workflow.

Termux, on the other hand, is a powerful terminal emulator and Linux environment for Android. It provides a command-line interface with access to a vast repository of Linux packages, transforming your Android device into a portable command-line workstation. Combining Tmux with Termux unlocks unprecedented mobile command-line power, enabling sophisticated operations from a device that’s always with you.

Installation Walkthrough: The Entry Point

Getting Tmux onto your Termux environment is straightforward, but requires attention to detail. Always update your package lists first to ensure you're fetching the latest versions and to avoid dependency conflicts. This is the first rule of engagement in any new environment.

  1. Update Package Lists: Open Termux and run:
    pkg update && pkg upgrade -y
    This ensures your package manager is up-to-date and all installed packages are the latest stable versions. The `-y` flag automatically confirms prompts, streamlining the process.
  2. Install Tmux: Once the update is complete, install Tmux with the following command:
    pkg install tmux -y
    This downloads and configures Tmux along with any necessary dependencies.
  3. Verify Installation: To confirm Tmux is installed and ready, simply type:
    tmux -V
    This should output the installed Tmux version, confirming a successful installation.

Essential Tmux Commands: The Operator's Handbook

Once Tmux is installed, you need to know how to wield it. The key to Tmux lies in its prefix key, which by default is `Ctrl+b`. All Tmux commands start with this prefix, followed by another key. Mastering these basic commands is your first step towards efficient operation.

Starting a New Session:

  • To start a new Tmux session:
    tmux
    or
    tmux new-session
  • To start a named session (highly recommended for organization):
    tmux new-session -s MySessionName

Basic Navigation:

  • Prefix + c: Create a new window.
  • Prefix + n: Navigate to the next window.
  • Prefix + p: Navigate to the previous window.
  • Prefix + <number> (e.g., Prefix + 0): Switch to a specific window by its number.
  • Prefix + w: List all windows.

Pane Management:

  • Prefix + %: Split the current pane vertically.
  • Prefix + ": Split the current pane horizontally.
  • Prefix + &larrarrow&rarrarrow&uarrarrow&darrarrow: Navigate between panes (e.g., Prefix + &rarrarrow moves to the pane on the right).
  • Prefix + x: Kill the current pane (use with caution).
  • Prefix + o: Cycle through panes.

Detaching and Reattaching:

  • Prefix + d: Detach from the current session. Your processes will continue to run.
  • To list all active sessions:
    tmux ls
  • To reattach to a session:
    tmux attach-session -t MySessionName

Other Useful Commands:

  • Prefix + ?: Show key bindings. A lifesaver when you forget something.
  • Prefix + :: Enter Tmux command mode for more advanced operations.

Remember, consistency is key. Practicing these commands regularly will embed them into your muscle memory, making your mobile operations seamless.

Advanced Workflows: Strategic Deployment

Once you're comfortable with the basics, Tmux can be optimized for complex security tasks. Imagine setting up a staging environment for testing exploits, monitoring network traffic, and maintaining a persistent C2 channel, all within a single mobile device.

  • Scripting Tmux Configurations: Create a ~/.tmux.conf file to customize your Tmux experience. You can rebind keys, set status bars, and define startup layouts. For example, to change the prefix key to `Ctrl+a`:
    set-option -g prefix C-a
        unbind C-b
        bind C-a send-prefix
    This is a common tweak for users migrating from screen or simply preferring this binding.
  • Automated Session Setup: Use shell scripts to launch Termux with pre-configured Tmux layouts. This is invaluable for quickly deploying your operational environment. For instance, a script could create a session with three panes: one for Nmap scanning, one for Metasploit, and one for general command execution.
  • Integration with Other Tools: Tmux panes can run any command. This means you can run packet sniffers like `tcpdump` in one pane, analyze the output with Wireshark (if available or by piping to a remote machine) in another, and run your exploitation scripts in a third.

The true power of Tmux in Termux lies in its ability to create a cohesive, persistent operational framework on a device that’s always connected.

Security Implications: Hardening Your Mobile Ops

While Tmux enhances your capabilities, it's crucial to consider the security of your mobile operations. Your phone is a powerful tool, but it's also a potential liability if compromised.

  • Session Security: Ensure your Android device itself is secured with a strong PIN, password, or biometric lock. If your device falls into the wrong hands while Tmux sessions are active, your data and ongoing operations are at risk.
  • Data Storage: Be mindful of where you store sensitive data. Termux stores files in its own sandboxed directory, but consider using encrypted storage solutions if dealing with highly classified information. The trade-off is always between accessibility and security.
  • Network Exposure: When using Termux for network operations, ensure you're connecting through trusted networks or a VPN. Exposing services or running scans from an untrusted network can inadvertently reveal your device's presence or lead to unforeseen consequences.
  • Permissions: Termux requires certain Android permissions (e.g., storage access, network access). Grant these judiciously and understand what each permission entails.

The best practice for any operator is defense in depth. Your mobile command center must be as hardened as any server you manage.

Verdict of the Engineer: Is It Worth It?

Absolutely. For anyone serious about command-line operations, mobile or otherwise, Tmux is not optional; it's foundational. Integrating it into Termux on an Android device elevates your capabilities exponentially. It transforms a pocket-sized gadget into a surprisingly potent tool for research, development, and, yes, security operations. While there's a learning curve, the efficiency gains and operational flexibility it provides are unparalleled in a mobile context. The ability to manage complex workflows, maintain persistent sessions, and switch between tasks effortlessly makes Tmux in Termux an indispensable asset. It’s the closest you’ll get to a full desktop CLI experience without carrying a laptop.

Arsenal of the Operator/Analyst

  • Terminal Emulator: Termux (essential for this setup)
  • Window Manager: Tmux (the star of the show)
  • Text Editor: Vim or Nano (both available via pkg install)
  • Networking Tools: Nmap, Wireshark (requires setup/specific builds), `wget`, `curl`, `ssh` (all available via pkg install)
  • Scripting Languages: Python, Bash (pre-installed or easily installable)
  • Books: "The Tmux Book" by J. B. Rainsberger, "The Pragmatic Programmer" (for general development philosophy), "The Web Application Hacker's Handbook" (for offensive security context)
  • Certifications: While not directly applicable to Tmux itself, skills honed here support certifications like OSCP, CompTIA Security+.

Frequently Asked Questions

Can I use Tmux without Termux?
Yes, Tmux is a standard Linux utility available on most desktop and server distributions. Termux simply brings this power to your Android device.
Is Tmux free?
Yes, Tmux is open-source software released under a permissive license. Both Tmux and Termux are free to use.
How do I customize Tmux further?
By editing the ~/.tmux.conf file. You can find numerous examples and tutorials online for advanced customization.
Can Tmux run GUI applications?
No, Tmux is strictly a terminal multiplexer and operates within the command-line interface. It cannot display or manage GUI applications.

The Contract: Secure Your Mobile Perimeter

You've seen the power, you've planned the deployment. Now, the real work begins. Your mandate is to establish Tmux as your default mobile command center. Configure your ~/.tmux.conf to reflect your operational needs. Set up at least two persistent, named sessions: one for reconnaissance and initial access, another for post-exploitation and data exfiltration. Automate the launch of these sessions with shell scripts triggered upon Termux startup. Document your preferred layouts and keybindings. The objective is not just to *use* Tmux, but to integrate it so deeply into your workflow that operating without it feels like fighting with one hand tied behind your back.

Now, the crucial question: What is one specific, non-obvious workflow you envision using Tmux in Termux for a security-related task? Share your innovative use cases and configuration snippets in the comments below. Let's build the ultimate mobile operator's manual together.

```