La red blockchain es un vasto océano de oportunidades, y en sus profundidades, los Non-Fungible Tokens (NFTs) han emergido como nuevas y lucrativas corrientes. Pero más allá del hype y las ventas millonarias, existe una arquitectura subyacente que permite a los creadores asegurar ingresos recurrentes. Olvídate de la magia de los unicornios; vamos a desmantelar el sistema para construir tu propio imperio digital con regalías. Hoy no venimos a vender sueños, venimos a entregar el plano para construirlos.
La creación de un NFT no es solo acuñar una imagen o un archivo de audio; es registrarlo en la blockchain, asignarle una identidad única e inmutable. Y lo más crucial, es establecer los términos de su posesión y transacción futura. Las regalías, esa fracción de cada reventa que regresa al creador original, son el verdadero oro digital. Son el contrato perpetuo que te vincula a tu obra, incluso después de que haya cambiado de manos mil veces.
Este no es un tutorial de "hazte rico rápido". Es un análisis técnico profundo diseñado para que entiendas el mecanismo, no solo para que presiones botones. Dominar la creación de NFTs con regalías es, en esencia, negociar un contrato inteligente en tu favor, una apalancamiento financiero sobre tu creatividad.
El ecosistema de los NFTs ha madurado más allá de las galerías digitales para artistas digitales. Hoy, los NFTs representan desde bienes raíces virtuales hasta recuerdos deportivos, certificaciones de autenticidad, e incluso la propiedad intelectual de canciones. La clave está en la *no fungibilidad*, la unicidad de cada token. Cada NFT es un registro en una blockchain (principalmente Ethereum, Polygon o Solana) que certifica la propiedad de un activo digital o físico.
La ventana de oportunidad se abrió de par en par para los creadores. Plataformas como OpenSea, Rarible y Foundation se han convertido en los mercados donde estos activos únicos se exhiben y comercian. Sin embargo, la verdadera innovación reside en los *contratos inteligentes* que gobiernan estos tokens, permitiendo incrustar lógica programable como las regalías.
Arquitectura de las Condiciones de Venta: Regalías en la Blockchain
Las regalías en los NFTs no son una cortesía; son un requisito programable dentro del estándar del token. Para la mayoría de las redes, esto se implementa a través del estándar ERC-2981 en Ethereum o sus equivalentes en otras blockchains. Este estándar define un método que permite a un contrato inteligente consultar el porcentaje de regalías asociado a un token específico.
Cuando un NFT se acuña, el contrato inteligente subyacente puede ser configurado para incluir un porcentaje de regalías (por ejemplo, 5% o 10%). Este porcentaje se asocia directamente al token ID. Posteriormente, cuando un usuario vende el NFT en un mercado compatible, el contrato inteligente del mercado detecta este porcentaje de regalía. Automáticamente, al completarse la transacción, un porcentaje del precio de venta se envía al monedero del creador original.
La magia aquí es la *automatización* y la *inmutabilidad*. Una vez establecido el contrato, las regalías se aplican en cada venta secundaria de forma transparente y sin necesidad de intervención manual. Esto significa que un creador puede seguir beneficiándose de su obra a lo largo del tiempo, sin importar cuántas veces cambie de manos. Es un flujo de ingresos pasivo garantizado por la código y la blockchain.
Herramientas del Operador Digital
Para operar en este espacio, necesitas un arsenal de herramientas.
Monedero de Criptomonedas: MetaMask es el estándar de facto para interactuar con redes como Ethereum y Polygon. Asegúrate de tenerlo instalado y configurado correctamente. Tu monedero es tu identidad digital en la blockchain y donde recibirás tus fondos.
Plataforma de Mercado NFT:OpenSea es el mercado más grande y accesible, ideal para principiantes y profesionales. Admite la acuñación (minting) gratuita de NFTs en redes como Polygon, eliminando las costosas tarifas de gas de Ethereum. Otras opciones a considerar son Rarible y Mintable.
Software de Creación de Contenido: Dependiendo de tu especialidad:
Arte Digital: Procreate (iPad), Adobe Photoshop, Illustrator, Blender (3D).
Música: Ableton Live, FL Studio, Logic Pro.
Video: Adobe Premiere Pro, Final Cut Pro.
Para aquellos que buscan un punto de partida accesible, incluso herramientas como Canva pueden ser suficientes para crear gráficos básicos que se pueden convertir en NFTs. La calidad del arte es importante, pero la originalidad y el concepto son aún más valorados en este mercado.
Herramientas de Gestión de Redes Sociales: Twitter es fundamental para promocionar tu trabajo y conectar con la comunidad NFT. Instagram también es útil para mostrar tu arte visual.
La elección de tu monedero y mercado puede depender de la blockchain en la que desees operar. Para evitar los altos costos de gas de Ethereum, la red Polygon es una excelente alternativa. Plataformas como OpenSea facilitan la acuñación en Polygon de forma gratuita.
Guía de Implementación: Acuñación y Configuración de Regalías
Vamos a desglosar el proceso para acuñar un NFT con regalías en OpenSea usando la red Polygon, una opción que minimiza los costos para el creador.
Prepara tu Activo Digital: Asegúrate de que tu obra de arte, video, GIF, música o cualquier otro archivo digital cumpla con los requisitos de formato de OpenSea (usualmente JPG, PNG, GIF, MP4, WEBM, MP3, WAV, OGG, GLB).
Conecta tu Monedero a OpenSea: Visita OpenSea.io y haz clic en el icono de monedero en la esquina superior derecha. Selecciona MetaMask (o tu monedero preferido) y aprueba la conexión. Asegúrate de estar en la red Polygon seleccionando la opción correspondiente en MetaMask.
Crea tu Colección: Navega a "Create" > "My Collections". Haz clic en "Create a collection". Deberás subir un logo, un banner y un nombre para tu colección. Elige la red "Polygon" para evitar tarifas de gas.
Configura los Detalles de la Colección: Escribe una descripción clara y atractiva para tu colección. Asegúrate de incluir palabras clave relevantes para mejorar la visibilidad.
Acuña tu NFT: Una vez creada la colección, ve a la página de tu colección y haz clic en "Add Item".
Subir Archivo: Sube tu activo digital.
Nombre y Descripción: Dota a tu NFT de un nombre memorable y una descripción detallada que explique su significado y valor.
Propiedades, Niveles, Estadísticas: Completa estos campos si tu NFT tiene atributos específicos que lo hacen único o parte de un conjunto.
Contenido Desbloqueable (Opcional): Puedes incluir un enlace a contenido exclusivo que solo el propietario del NFT podrá acceder.
Suministro: Si deseas crear múltiples copias idénticas de tu NFT, puedes especificarlo aquí (aunque para la mayoría de los casos, el suministro será 1).
Cadena de Bloques: Asegúrate de que esté seleccionada "Polygon".
Congelar Metadatos (Avanzado): Para mayor seguridad y descentralización, puedes "congelar" los metadatos de tu NFT después de la acuñación. Esto significa que la información del NFT se almacenará de forma descentralizada (por ejemplo, en IPFS).
Configura las Regalías: Aquí es donde reside el poder para el creador. En la sección "Royalties", introduce el porcentaje de regalías que deseas recibir en cada venta secundaria. Un valor común y aceptado es entre el 5% y el 10%. Asegúrate de que la dirección de tu monedero esté correctamente asociada para recibir estos pagos.
Crea el NFT: Haz clic en "Create". Tu NFT será acuñado en la red Polygon sin costo de gas inicial.
Pon tu NFT a la Venta: Una vez acuñado, puedes poner tu NFT a la venta. Elige entre un precio fijo o una subasta. El mercado actualizará automáticamente el precio y la información relevante.
La clave, como ves, está en la configuración inicial. Una vez que el NFT está en la blockchain con las regalías establecidas, el sistema hace el trabajo pesado por ti.
"La verdadera seguridad no reside en las defensas que construyes, sino en la lógica inmutable que incrustas en el sistema." - Un Operador Anónimo
Veredicto del Ingeniero: ¿Vale la pena apostar por los NFTs con Regalías?
Desde una perspectiva técnica y de negocio, los NFTs con regalías representan un modelo financiero disruptivo y sostenible para los creadores. La capacidad de generar ingresos pasivos a largo plazo es un cambio de paradigma respecto a los modelos de pago únicos tradicionales.
Pros:
Ingresos Pasivos Continuos: El principal atractivo es la posibilidad de monetizar tu obra a perpetuidad.
Empoderamiento del Creador: Los artistas y creadores obtienen un mayor control sobre su propiedad intelectual y su valor de mercado.
Comunidad y Lealtad: Las regalías fomentan una conexión continua entre el creador y su base de coleccionistas.
Bajo Costo Inicial (con Polygon): Plataformas como OpenSea en Polygon eliminan la barrera de las costosas tarifas de gas, haciendo la acuñación accesible.
Contras:
Volatilidad del Mercado: El valor de los NFTs puede ser extremadamente volátil, influenciado por tendencias y especulación.
Complejidad Técnica: Aunque las interfaces se simplifican, comprender la tecnología subyacente y la seguridad de tus claves privadas es crucial.
Adopción del Mercado: No todos los mercados soportan regalías de forma nativa, y la adopción general aún está en evolución.
Consideraciones Legales y Fiscales: Los ingresos por regalías deben ser gestionados fiscalmente, lo cual puede ser complejo.
En resumen, si tu objetivo es crear valor sostenible y mantener una conexión a largo plazo con tu audiencia, invertir tiempo en entender y configurar NFTs con regalías es una estrategia inteligente. No es una mina de oro sin esfuerzo, sino una herramienta poderosa para la ingeniería financiera creativa.
Preguntas Frecuentes
¿Necesito pagar para crear un NFT con regalías en OpenSea?
No, si eliges acuñar en la red Polygon, la creación del NFT es gratuita. Las tarifas se aplican solo cuando el NFT se vende por primera vez o cuando se transfiere la propiedad de la colección.
¿Qué porcentaje de regalías es el "correcto"?
No hay un porcentaje único "correcto". Un 5% a 10% es común en el mercado, pero puedes ajustarlo según el valor que percibas para tu obra. Lo importante es que sea sostenible para los compradores.
¿Puedo cambiar las regalías después de acuñar un NFT?
Generalmente, una vez que un NFT se ha acuñado en la blockchain, las regalías asociadas a ese token específico no se pueden modificar. Debes configurar las regalías correctamente durante el proceso de acuñación o al crear la colección en plataformas que lo permitan.
¿Qué pasa si el comprador vende mi NFT fuera de OpenSea?
Si el NFT se vende en otro mercado que no soporta o no está configurado para aplicar regalías, no recibirás esa comisión. Por eso es crucial usar mercados compatibles y transparentes.
El Contrato: Tu Primer Paso Hacia la Independencia Financiera
Tu misión ahora es simple, pero profunda. Elige una de tus creaciones digitales y sigue los pasos para acuñarla en la red Polygon a través de OpenSea. Configura un porcentaje de regalías razonable, digamos 7.5%. Promociona tu obra en Twitter y en tu círculo de contactos.
El verdadero desafío no es solo venderlo; es observar cómo, si se revende en el futuro, tu monedero se incrementa pasivamente. Este no es un juego de azar, es ingeniería de ingresos. Si consigues que tu primer NFT con regalías genere incluso una pequeña comisión en una venta secundaria, has validado el modelo. Ahora, multiplica esa estrategia. Tu conocimiento sobre la arquitectura de los contratos inteligentes es tu activo más valioso.
La pantalla brilla, vacía, esperando la chispa creativa. En este negocio, no solo construyes juegos, sino mundos. Y Unity es el martillo, el cincel y el plano. Este motor, un coloso silencioso en la industria, permite a los soñadores construir imperios digitales, desde la complejidad granular de un juego 2D hasta la inmersión total de la realidad virtual para PC, consolas y el bolsillo de cada usuario. Hoy, no solo te daré un tutorial, te abriré la puerta de entrada a tu propio estudio indie. Abróchate el cinturón.
Vamos a desmantelar Unity, pieza por pieza, hasta que comprendas su arquitectura interna. Porque entender cómo funcionan las cosas es el primer paso para romperlas... o construirlas magistralmente.
Instalación y Configuración: El Primer Paso Crítico
Antes de que cualquier código vea la luz, necesitas la herramienta correcta. Descargar Unity es un rito de paso. Dirígete a unity.com. No te conformes con la versión por defecto si buscas eficiencia a largo plazo; considera Unity Hub para gestionar múltiples versiones y proyectos, una práctica indispensable si realmente te tomas en serio el desarrollo de juegos. La instalación requiere una cuenta; si no la tienes, créala. Piensa en ella como tu credencial de acceso al universo Unity.
Desglosando la Interfaz de Unity: Tu Centro de Comando
Al abrir Unity, te enfrentarás a un panel de control complejo, pero lógico. La Vista de Escena es tu lienzo principal, donde colocas y das forma a cada elemento. A la izquierda, la ventana Project es tu archivo, donde reside todo: modelos, texturas, scripts, audio. Es crucial mantener esta ventana organizada; una estructura de carpetas clara (Assets/Scripts, Assets/Models, etc.) es la diferencia entre el caos y el control. A la derecha, el Inspector es tu panel de control para cada objeto seleccionado. Aquí se ajustan propiedades, se añaden componentes y se vinculan scripts. La ventana Hierarchy te muestra la estructura jerárquica de tu escena: objetos padres e hijos, una organización vital para escenas complejas. Finalmente, la Console es tu diario de guerra, donde los errores, advertencias y mensajes de depuración aparecerán. Ignorarlos es un error de principiante.
Importación de Recursos: El Arte de Traer el Mundo a tu Juego
Tu juego necesita vida. Los modelos 3D (FBX, OBJ son estándar), texturas (PNG, JPG, TGA), audio (WAV, MP3) y otras herramientas se importan arrastrándolos directamente a la ventana Project. Unity es flexible, soporta una amplia gama de formatos. Pero no te limites a arrastrar y soltar a ciegas. Considera la optimización: comprime texturas, optimiza modelos 3D. Cada kilobyte cuenta, especialmente en plataformas móviles. Unity te permite ajustar la configuración de importación para cada tipo de recurso, afinando su uso en el juego.
Creación de Escenas: Donde la Magia Sucede
Una escena es, esencialmente, un nivel o un menú. Comienzas con una escena básica (Archivo > Nueva Escena). Puedes crear una escena vacía o utilizar plantillas. Para poblar tu escena, arrastra los recursos importados desde la ventana Project a la Vista de Escena. Alternativamente, puedes crear objetos vacíos (Hierarchy > Click Derecho > Crear Vacío) y luego asignarles componentes y recursos. La organización es clave: nombra tus objetos de forma descriptiva (ej: "PlayerCharacter", "MainCamera", "Level1_Background").
Manipulación de Objetos: Esculpiendo tu Realidad Digital
Una vez que los objetos están en la escena, puedes moldearlos. Las herramientas de transformación (mover, rotar, escalar) se encuentran en la barra superior de la Vista de Escena. Selecciona un objeto, usa las herramientas y observa cómo cambian sus propiedades en el Inspector. Puedes configurar su posición, rotación y escala. Además, puedes adjuntar componentes para darles comportamientos específicos (más sobre esto en la siguiente sección).
Scripts y Componentes: El Alma de tu Juego
Aquí es donde el juego cobra vida. Unity utiliza C# como su lenguaje de scripting principal. Cualquier desarrollador serio de Unity debe dominar C#. Para añadir interactividad, creas scripts (Project > Click Derecho > Crear > Script C#). Asigna este script a un objeto (arrastrándolo a la Vista de Escena o al Inspector del objeto). Dentro del script, escribes código C# para controlar el comportamiento, la lógica, las animaciones, las colisiones... ¡todo! Unity tiene un sistema de componentes robusto. Cada objeto en la escena es un "GameObject" que puede tener múltiples "Componentes" adjuntos. El componente "Transform" es el único obligatorio, pero puedes añadir "Mesh Renderer" para hacerlo visible, "Rigidbody" para la física, y tus propios scripts C# para la lógica personalizada.
"El código es mi arma, los componentes mi armadura."
La integración entre scripts y componentes es fluida. Puedes obtener referencias a otros componentes en el mismo GameObject o en otros, permitiendo interacciones complejas. La documentación de Unity para C# y su API es extensiva; úsala. No intentes reinventar la rueda.
Configuración de Física: Simulación y Realismo Digital
Para que tu juego se sienta real, necesitas física. Unity usa PhysX para simular interacciones. Añade un componente Rigidbody a un objeto para que esté sujeto a la gravedad y a las fuerzas. Ajusta sus propiedades como masa, arrastre y restricciones en el Inspector. Para detectar colisiones, necesitas Colliders (Box Collider, Sphere Collider, Capsule Collider, Mesh Collider). Estos definen la forma del objeto para las interacciones físicas. Puedes configurar materiales físicos (Physics Material) para controlar la fricción y el rebote.
Compilación y Ejecución: Liberando tu Creación al Mundo
Has trabajado duro. Ahora es el momento de empaquetar tu obra maestra. Ve a File > Build Settings. Aquí seleccionas tu Plataforma de Destino: Windows, macOS, Linux, Android, iOS, WebGL, consolas... La eficiencia de la compilación multicanal es una de las fortalezas de Unity. Elige tu plataforma, configura los ajustes (resolución, calidad) y haz clic en "Build". Unity generará un ejecutable o una aplicación lista para ser distribuida y probada. No te saltes la fase de pruebas rigurosas en la plataforma de destino; lo que funciona en tu máquina puede fallar en otra.
Arsenal del Operador/Analista: Herramientas Esenciales para el Desarrollador Indie
Editor de Código: Visual Studio (con el paquete para Unity) o Rider. No te conformes con el editor básico de Unity para scripts complejos.
Control de Versiones: Git (con GitHub, GitLab o BitBucket). Indispensable para cualquier proyecto colaborativo o para tener copias de seguridad robustas.
Software de Modelado 3D: Blender (gratuito y potente) o Maya/3ds Max (si tu presupuesto lo permite).
Software de Edición Gráfica: Photoshop o GIMP (gratuito).
Gestión de Proyectos: Trello, Asana, o Jira para organizar tareas y flujos de trabajo.
Documentación y Aprendizaje: La documentación oficial de Unity y el canal de YouTube de Unity Learn son tus mejores aliados.
Cursos Avanzados: Para profundizar, los cursos de Udemy, Coursera, o plataformas especializadas como cursos de Unity avanzado pueden acelerar tu curva de aprendizaje. Considera la certificación de Unity si buscas un reconocimiento formal.
Preguntas Frecuentes
¿Unity es gratuito?
Unity ofrece niveles gratuitos (Personal) y de pago (Plus, Pro, Enterprise) con diferentes características y límites de ingresos. Para empezar y para la mayoría de desarrolladores indie, la versión Personal es suficiente.
¿Necesito saber C++ para usar Unity?
No, Unity utiliza C# para el scripting. C++ se usa en motores como Unreal Engine.
¿Qué tipo de juegos puedo crear con Unity?
Prácticamente cualquier cosa: juegos 2D, 3D, móviles, de realidad virtual, de realidad aumentada, experiencias interactivas, visualizaciones y más.
¿Hay limitaciones en la importación de recursos?
Unity soporta una gran variedad de formatos, pero siempre es recomendable optimizar tus recursos (texturas comprimidas, modelos con recuento de polígonos adecuado) para un mejor rendimiento.
¿Es difícil aprender Unity?
Unity tiene una curva de aprendizaje, pero su interfaz intuitiva y la gran cantidad de recursos disponibles lo hacen accesible para principiantes. La clave es la práctica constante.
El Contrato: Tu Primer Salto al Desarrollo de Juegos
Has transitado desde la instalación hasta la compilación. Ahora tienes el conocimiento, pero el conocimiento sin aplicación es solo información muerta. Tu contrato es este: crea un pequeño proyecto. No tiene que ser un MMORPG. Un juego de plataformas sencillo con un personaje que se mueve y salta, o un shooter simple. Enfócate en implementar un ciclo de juego completo: entrada del jugador, movimiento, colisión básica y un objetivo simple. Usa lo aprendido sobre la interfaz, la importación de recursos y, crucialmente, la creación de scripts simples en C# para añadir la lógica.
No busques la perfección. Busca la funcionalidad. El primer juego rara vez es una obra maestra, pero es el catalizador de todas las obras maestras futuras. No te detengas en la teoría. El código espera tu comando.
Ahora, la pregunta es: ¿estás listo para firmar este contrato y empezar a construir tu primer mundo? ¿Qué tipo de juego te intriga más para tu primer proyecto y qué desafío crees que enfrentarás al implementarlo?
En el panorama digital actual, la viralidad no es un accidente; es el resultado de una estrategia calculada y el uso inteligente de las herramientas disponibles. Hoy, te revelo el blueprint para crear videos 3D que capturan la atención y se propagan como la pólvora, todo ello utilizando el poder de la Inteligencia Artificial y, lo más importante, de forma completamente gratuita. Este no es un tutorial superficial; es un dossier operativo completo diseñado para que cualquier persona, sin importar su nivel de experiencia, pueda replicar este éxito. Prepárate para transformar tu contenido.
Lección 1: Preparación Táctica del Canal (03:17)
Antes de lanzar la primera inteligencia artificial para generar arte, debemos establecer las bases de nuestra operación. Un canal optimizado es el primer paso para asegurar que tu contenido no solo sea visto, sino que también sea descubierto y recomendado.
Definición del Nicho: Identifica un nicho específico que te apasione y donde la visualización 3D tenga un alto potencial de engagement. ¿Ciencia ficción? ¿Educación? ¿Mascotas? La claridad aquí guiará la estética y el tipo de contenido.
Optimización del Perfil:
Nombre y Handle: Elige un nombre pegadizo y fácil de recordar. Asegúrate de que tu handle (en YouTube, TikTok, etc.) sea consistente en todas las plataformas.
Descripción del Canal: Redacta una descripción concisa y rica en palabras clave que explique de qué trata tu canal y qué valor ofreces. Incluye una llamada a la acción para suscribirse.
Banner y Foto de Perfil: Diseña elementos visuales profesionales y coherentes que reflejen la temática de tu canal.
Estrategia de Contenido Inicial: Planifica tus primeros 5-10 videos. Esto crea un flujo de trabajo y asegura que tengas material listo para mantener la constancia.
Acción Operativa Clave: Asegúrate de que tu canal esté completamente configurado y optimizado antes de proceder a la generación de contenido. La primera impresión es crucial.
Si este blueprint te ha ahorrado horas de trabajo, compártelo en tu red profesional. El conocimiento es una herramienta, y esta es un arma.
Lección 2: Elaboración de Prompts de Alto Impacto (07:08)
La IA es tan buena como las instrucciones que le das. La creación de prompts efectivos es el arte de traducir tu visión en un lenguaje que la máquina pueda interpretar para generar resultados sorprendentes. El documento de prompts es tu kit de herramientas principal.
Estructura de un Prompt Maestro:
Sujeto/Elemento Principal: Describe claramente qué quieres ver. (Ej: "Un astronauta flotando en el espacio").
Estilo Visual/Estética: Define la apariencia. (Ej: "Estilo cinematográfico, 3D render, realista, alta definición, colores vibrantes").
Iluminación y Atmósfera: Especifica el ambiente. (Ej: "Iluminación dramática, luz de neón, atmósfera de misterio").
Composición y Cámara: Indica el encuadre. (Ej: "Plano medio, cámara lenta, vista panorámica").
Detalles Adicionales: Incluye cualquier otro elemento relevante. (Ej: "Partículas flotando, reflejos en el casco").
Consejo de Ingeniero: Experimenta. Modifica palabras, añade adjetivos, cambia el orden. Cada pequeño ajuste puede alterar drásticamente el resultado. Itera hasta que la IA entregue la visión que tenías en mente.
Lección 3: Generación Estratégica de Contenido 3D (08:32)
Con tus prompts listos, es hora de activar la IA y comenzar la generación. La clave aquí es la eficiencia y la consistencia.
Plataformas Gratuitas Sugeridas:
Para Vídeo/Animación Corta: Explora herramientas como RunwayML, Kaiber.ai (con créditos gratuitos) o Stable Video Diffusion (si tienes la capacidad técnica de ejecutarlo localmente).
Para Imágenes Estáticas (que puedes animar luego): Midjourney (con créditos limitados), Leonardo.Ai, o Stable Diffusion (localmente).
Proceso de Generación:
Introduce tus prompts cuidadosamente elaborados en la plataforma IA elegida.
Genera múltiples variaciones de cada escena o elemento. No te conformes con la primera opción.
Selecciona los clips o imágenes de mayor calidad y que mejor se alineen con tu narrativa.
Considera la duración: para viralidad, los clips cortos y dinámicos suelen funcionar mejor, especialmente en plataformas como TikTok o Reels.
Advertencia Ética: Las herramientas de IA están en constante evolución. Asegúrate de revisar los términos de servicio de cada plataforma respecto a la propiedad y el uso comercial del contenido generado.
Recursos Adicionales: Para acceder a una colección curada de recursos gratuitos y herramientas que te ayudarán en este proceso, únete a nuestra comunidad: Comunidad Discord de Recursos Gratuitos.
Lección 4: Ensamblaje Maestro: Uniendo las Piezas (11:27)
El contenido bruto está listo. Ahora, la tarea es ensamblarlo en una pieza cohesiva y de alto impacto. La edición es donde la magia se completa.
Software de Edición Gratuito:
Desktop: DaVinci Resolve (extremadamente potente y gratuito), OpenShot, Shotcut.
Móvil: CapCut, InShot.
Proceso de Edición:
Importar y Organizar: Carga todos tus clips generados por IA en tu software de edición. Organízalos por escena o narrativa.
Secuenciación: Construye tu video siguiendo la estructura planificada. Asegúrate de que haya un flujo lógico y un ritmo adecuado.
Añadir Música y Efectos de Sonido: Una banda sonora impactante puede elevar drásticamente la calidad percibida de tu video. Utiliza bibliotecas de música libre de derechos (como la de YouTube Audio Library).
Transiciones y Efectos: Utiliza transiciones sutiles para suavizar los cortes entre clips. Los efectos de texto o gráficos animados pueden añadir profesionalismo.
Corrección de Color (Opcional pero Recomendado): Ajusta los colores para asegurar consistencia y mejorar la estética visual.
Optimización para la Plataforma: Exporta tu video en la resolución y formato adecuados para la plataforma donde lo vayas a publicar (vertical para TikTok/Reels, horizontal para YouTube).
La Clave de la Viralidad: Mantén la atención. Los primeros segundos son críticos. Asegúrate de que el inicio sea intrigante. Utiliza cortes rápidos, música dinámica y elementos visuales llamativos para mantener al espectador enganchado.
¿Conoces a alguien atascado con la creación de contenido? Etiquétalo en los comentarios. Un buen operativo no deja a un compañero atrás.
El Arsenal del Ingeniero Digital
Para dominar la creación de contenido 3D con IA, necesitas las herramientas adecuadas. Aquí tienes una selección curada:
Plataformas de IA Generativa con Créditos Gratuitos o Versiones Free-Tier:
YouTube (para tutoriales específicos de cada herramienta)
Análisis Comparativo: IA Generativa vs. Métodos Tradicionales
La IA ha democratizado la creación 3D, pero ¿cómo se compara con los flujos de trabajo tradicionales?
Velocidad: La IA gana de forma abrumadora. Lo que antes tomaba días o semanas de modelado y renderizado, ahora puede generarse en horas o minutos.
Costo: La IA ofrece opciones gratuitas (con limitaciones) o de bajo costo, mientras que el software 3D profesional y el hardware de renderizado pueden ser prohibitivamente caros.
Curva de Aprendizaje: La IA, especialmente con prompts bien diseñados, tiene una curva de aprendizaje significativamente menor que el modelado 3D complejo (Blender, Maya, 3ds Max). Sin embargo, dominar el arte del prompt es un desafío en sí mismo.
Control y Personalización: Aquí es donde los métodos tradicionales aún tienen ventaja. El control granular sobre cada polígono, textura y animación es mucho mayor con software 3D dedicado. La IA es excelente para generar resultados sorprendentes rápidamente, pero la personalización profunda puede ser limitada o requerir iteraciones complejas.
Calidad y Coherencia: Las herramientas de IA han mejorado drásticamente, pero la coherencia a largo plazo en animaciones complejas o el mantenimiento de un estilo visual exacto a través de múltiples generaciones puede ser un desafío. El renderizado tradicional, con la configuración correcta, ofrece un control total sobre la calidad final.
Veredicto: Para la creación rápida de contenido viral, especialmente en videos cortos y piezas visualmente impactantes, la IA es la opción superior y más accesible. Para proyectos de alta gama que requieren control artístico absoluto y animaciones complejas, el software 3D tradicional sigue siendo el rey. La estrategia ideal a menudo implica una combinación de ambas, utilizando la IA para generar activos o conceptos rápidos y luego refinándolos con herramientas 3D tradicionales.
Veredicto del Ingeniero
La era de la creación de contenido 3D accesible ha llegado. Las herramientas de Inteligencia Artificial, incluso en sus versiones gratuitas, ofrecen un poder sin precedentes para generar visuales impactantes que antes estaban reservados para estudios con grandes presupuestos. El secreto reside en la estrategia: optimizar tu plataforma, dominar el arte de los prompts y ensamblar el contenido de manera efectiva. No se trata de reemplazar la habilidad humana, sino de amplificarla. Este dossier te proporciona el mapa; la ejecución depende de ti. Ahora, sal y crea algo viral.
Preguntas Frecuentes (FAQ)
¿Realmente puedo hacer videos 3D virales solo con herramientas gratuitas?
Sí, es posible. Las herramientas gratuitas o con generosos créditos iniciales te permiten experimentar y crear contenido de alta calidad. La viralidad depende más de la estrategia, el nicho y la calidad de tu contenido que del costo de las herramientas.
¿Es difícil aprender a crear buenos prompts?
Requiere práctica e iteración. Dominar los prompts es un arte. Empieza con la estructura básica, experimenta y analiza los resultados. El documento de prompts adjunto es un excelente punto de partida.
¿Qué plataforma de IA es mejor para empezar?
Para principiantes, Leonardo.Ai o RunwayML suelen ser buenas opciones por su interfaz intuitiva y sus planes gratuitos. Si tienes conocimientos técnicos, Stable Diffusion ofrece la máxima flexibilidad.
¿Qué hago si la IA no genera lo que quiero?
Revisa tu prompt: sé más específico, cambia adjetivos, prueba diferentes estilos. También, considera usar la IA para generar elementos o escenas individuales y luego unirlos en un editor de video para mayor control.
¿Cómo puedo monetizar mis videos 3D generados por IA?
A través de plataformas de publicidad (YouTube AdSense), marketing de afiliación, venta de contenido (si la licencia lo permite), o construyendo una marca personal que atraiga patrocinios. Una estrategia inteligente es diversificar. Para ello, considera abrir una cuenta en Binance y explorar el ecosistema cripto.
Sobre el Autor
Soy The Cha0smagick, un ingeniero de sistemas y hacker ético con una obsesión por desmantelar la complejidad y construir soluciones. Comparto inteligencia de campo y blueprints técnicos para navegar el panorama digital. Mi misión es empoderarte con conocimiento accionable.
Tu Misión: Ejecuta, Comparte y Debate
Este dossier te ha entregado las claves. Ahora, la responsabilidad de la ejecución recae en ti. No te quedes solo con la teoría: ponla en práctica.
Ejecuta: Comienza a crear tu primer video 3D viral hoy mismo.
Comparte: Si este blueprint te ha resultado valioso, compártelo en tus redes. Ayuda a otros operativos digitales a mejorar sus tácticas.
Debate: ¿Tienes preguntas? ¿Descubriste una técnica que no mencioné? ¿Quieres sugerir el próximo dossier? ¡Comenta abajo!
Debriefing de la Misión
Tu feedback es esencial para refinar nuestras estrategias futuras. Comparte tus éxitos, tus desafíos y tus ideas. El conocimiento compartido es poder multiplicador.
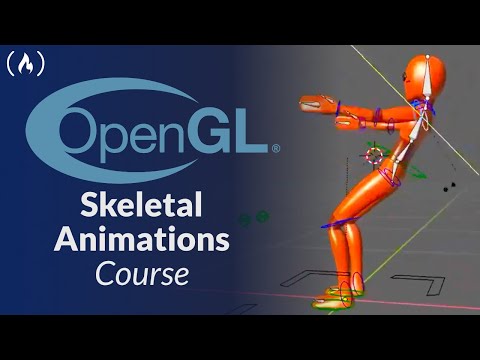
The digital realm, much like a city's underbelly, has its hidden mechanisms. We often focus on the walls, the firewalls, the obvious defenses. But what about the very structure of the digital entities we interact with? In this deep dive, we're not just rendering polygons; we're dissecting the skeletal structure of animated 3D models, a technique often employed in games and simulations. Understanding how these animations are constructed and loaded is a critical step for any security professional looking to analyze potentially malicious 3D assets, identify vulnerabilities in rendering engines, or simply appreciate the complexity of the systems we protect. Today, we peel back the layers of OpenGL and the Assimp library to understand skeletal animation from a blue-team perspective.
## Table of Contents
[The Unseen Mechanics: Why Skeletal Animation Matters for Security](#the-unseen-mechanics-why-skeletal-animation-matters-for-security)
[Anatomy of a Skeletal Rig: Bones, Weights, and Transformations](#anatomy-of-a-skeletal-rig-bones-weights-and-transformations)
Understanding the Bone Hierarchy
Vertex Weights: The Invisible Threads
Animation Channels: Defining Movement Over Time
[Assimp: The Digital Excavator](#assimp-the-digital-excavator)
Loading and Parsing Model Data
Extracting Skeletal Information
[Defense in Depth: Securing the Rendering Pipeline](#defense-in-depth-securing-the-rendering-pipeline)
Input Validation for 3D Assets
Memory Safety in Rendering Engines
Threat Hunting for Malicious 3D Models
[Engineer's Verdict: Assessing the Risks and Rewards](#engineers-verdict-assessing-the-risks-and-rewards)
[Operator's Arsenal: Essential Tools and Knowledge](#operators-arsenal-essential-tools-and-knowledge)
The Unseen Mechanics: Why Skeletal Animation Matters for Security
In the shadowy corners of cybersecurity, we’re trained to look for the anomalies, the unexpected behaviors. Skeletal animation, while seemingly a purely artistic or gaming-centric topic, is a fundamental building block in many applications. Understanding its inner workings provides crucial defensive insights. Consider these points:
**Attack Surface:** Rendering engines are complex pieces of software. Vulnerabilities can exist in how they parse 3D model data, including skeletal rigs and animations. A malformed 3D asset could potentially lead to buffer overflows, denial-of-service conditions, or even remote code execution if the parsing logic is flawed.
**Data Integrity:** Malicious actors might attempt to tamper with animation data to cause unexpected rendering artifacts, hide malicious payloads within seemingly innocuous 3D models, or exploit logic flaws in the animation playback system.
**Threat Hunting:** Recognizing the patterns of skeletal animation data and how it’s processed can be a valuable skill for threat hunters. Unusual bone structures, unexpected animation sequences, or malformed animation data in logs or network traffic could be indicators of compromise.
**Reverse Engineering:** For those tasked with understanding proprietary software or analyzing malware with graphical components, dissecting skeletal animations is key to understanding the software's behavior and intent.
This tutorial, framed as a defensive analysis, will equip you with the knowledge to understand these structures, not to exploit them, but to fortify against potential threats.
Anatomy of a Skeletal Rig: Bones, Weights, and Transformations
At its core, skeletal animation is about deforming a mesh (the 3D model) by manipulating a hierarchy of virtual "bones." Imagine a puppet: the skeleton is the wireframe, and the mesh is the puppet's skin. Each bone can be moved, rotated, and scaled, and these transformations influence the surrounding vertices of the mesh.
Understanding the Bone Hierarchy
A skeletal rig is organized as a tree structure. A root bone typically sits at the base, and other bones are parented to it. For example, in a character model, the spine might be parented to a root bone, the chest to the spine, shoulders to the chest, arms to the shoulders, and so on. This hierarchy is crucial because transformations are applied hierarchically: when a parent bone moves, its children move with it.
Vertex Weights: The Invisible Threads
A single bone rarely influences an entire mesh. Instead, each vertex in the mesh is assigned a "weight" for one or more bones. These weights determine how much a specific bone's transformation affects that vertex. A vertex near a character's elbow might be influenced by both the upper arm bone and the forearm bone, each with different weightings. This allows for smooth skin deformation rather than rigid, segmented movement.
A vertex can be influenced by multiple bones, each with a specific weight. The sum of weights for a given vertex typically equals 1.0. For instance, a vertex on the edge of a joint might have 0.5 weight for the upper arm bone and 0.5 for the forearm bone, allowing for smooth bending. Analyzing these weights is crucial for identifying potential rigging issues or areas ripe for exploitation if the rendering engine mishandms them.
Animation Channels: Defining Movement Over Time
Animations are sequences of transformations applied to bones over time. Each bone may have its own "animation channel" that defines its position, rotation, and scale at various keyframes. The animation system then interpolates between these keyframes to create smooth motion.
An animation is essentially a collection of these channels for all animated bones, tied together by a timeline. Understanding how these channels are defined, sampled, and applied is key to analyzing animation data. Malformed animation data could lead to clipping, unnatural movements, or buffer overflows if the interpolation logic is not robust.
Assimp: The Digital Excavator
When dealing with 3D models in various formats (like `.obj`, `.fbx`, `.gltf`), manually parsing each one is a Herculean task. This is where libraries like Assimp (Open Asset Import Library) become indispensable. Assimp is a cross-platform open-source library that can load many popular 3D model formats, providing a consistent interface for accessing model data, including skeletal animations.
Loading and Parsing Model Data
At its core, Assimp provides a `Scene` object that encapsulates all the data from a loaded model. This includes meshes, materials, textures, lights, cameras, and crucially for us, animation data. The `aiScene` structure contains pointers to arrays of `aiMesh`, `aiMaterial`, and `aiNodeAnim` structures.
The process typically involves:
1. Including the Assimp headers.
2. Creating an `Assimp::Importer` instance.
3. Calling the `ReadFile` method with the model path and desired import flags.
4. Error checking the import process.
5. Traversing the `aiScene` to extract the relevant data.
A common mistake security analysts might overlook is insufficient validation of the imported scene flags. Certain flags can enable more complex parsing routines that might, in turn, expose more complex parsing vulnerabilities if not handled carefully in the application layer.
Extracting Skeletal Information
Assimp represents the bone hierarchy using `aiNode` structures. Each `aiNode` has a name, transformation matrix, and parent/child relationships. These nodes form the basis of the skeletal structure.
Animation data is stored within `aiAnimation` structures. Each `aiAnimation` object contains an array of `aiNodeAnim` objects, one for each bone that is animated. Each `aiNodeAnim` stores keyframes for position, rotation, and scaling.
To reconstruct the skeletal animation for rendering, we typically need to:
1. Identify the root node of the skeleton.
2. Traverse the node hierarchy to build an internal representation of the skeletal transformation matrices.
3. For a given animation time, sample the `aiNodeAnim` channels to get the transformation for each bone at that specific moment.
4. Apply these local bone transformations to the global transformation matrix of the node.
5. Construct the "final bone matrices" by multiplying the global bone transformation by the inverse bind matrix (or offset matrix) associated with each bone in the mesh. These are the matrices that are ultimately sent to the GPU for vertex skinning.
Defense in Depth: Securing the Rendering Pipeline
Understanding the mechanics of skeletal animation is the first step. The next is to recognize how this knowledge can be weaponized and, more importantly, how to defend against it.
Input Validation for 3D Assets
Just as we validate user input from web forms or APIs, we must validate 3D model import data. This includes:
**File Format Integrity:** Ensure the file adheres to the expected format specifications. Malformed headers or unexpected data structures can be red flags.
**Data Bounds:** Check for unreasonably large bone counts, excessive vertex weights per vertex, or animation timelines that span impossibly long durations.
**Resource Limits:** Implement limits on polygon counts, texture sizes, and animation complexity to prevent denial-of-service attacks.
**Sanitization:** If the 3D data is ever exposed to other systems, ensure proper sanitization to prevent injection attacks originating from malicious model data.
Libraries like Assimp can be configured with various flags to control which features are imported. A defensive stance would involve selectively disabling potentially risky importers or parsing features if they are not strictly necessary for your application's functionality.
Memory Safety in Rendering Engines
The complex nature of 3D graphics and animation processing can lead to memory-related vulnerabilities. Common pitfalls include:
**Buffer Overflows:** Improperly sized buffers for storing bone matrices, vertex data, or animation keyframes can be overrun by malicious input.
**Use-After-Free:** Incorrect management of dynamically allocated memory for animation data can lead to pointers referencing deallocated memory, opening doors for exploitation.
**Integer Overflows:** Calculations involving indices, counts, or sizes can overflow, leading to incorrect memory accesses.
Robust code reviews, static analysis tools, and dynamic analysis (fuzzing) are essential to uncover these memory safety issues in custom rendering engines or when integrating libraries like Assimp. Always compile with security flags enabled (`-Wextra -Wall -Werror` for GCC/Clang, for instance).
Threat Hunting for Malicious 3D Models
As a threat hunter, you might encounter malicious 3D models used in various ways:
**Exfiltrating Data:** Embedding hidden data within seemingly normal animation sequences or unused parts of a 3D model file.
**Exploiting Vulnerabilities:** Crafting malformed models specifically designed to trigger vulnerabilities in rendering engines, media players, or CAD software.
**Camouflage:** Using 3D models as carriers for malware, where the malicious code might be obfuscated within the model's metadata or execution logic.
Your approach to hunting would involve:
1. **Artifact Analysis:** Examining files on disk, network captures, or memory dumps for suspicious 3D file formats.
2. **Behavioral Analysis:** Monitoring applications that process 3D data for unusual resource consumption, unexpected network connections, or crashes.
3. **Signature-Based Detection:** Developing YARA rules or other signature-based methods to detect known malicious 3D models or patterns associated with them.
Engineer's Verdict: Assessing the Risks and Rewards
Assimp is an invaluable tool for developers working with 3D assets. Its ability to abstract away the complexities of various file formats significantly speeds up development. From a security perspective, it's a double-edged sword. It simplifies loading, but the sheer complexity of the formats it supports means a robust understanding of its parsing mechanisms and potential edge cases is paramount.
**Pros:**
Broad format support.
Consistent API.
Open-source, allowing for code inspection.
Reduces development time for 3D asset integration.
**Cons:**
Complexity of supported formats introduces a large attack surface.
Requires careful configuration and validation of imported data to prevent vulnerabilities.
Potential for memory safety issues if underlying parsing is not handled by the application securely.
For defense, always use the latest stable version of Assimp and be judicious with the import flags you enable. If you only need geometry and materials, disable animation importers. Never trust raw 3D model data from untrusted sources without rigorous validation.
Operator's Arsenal: Essential Tools and Knowledge
To effectively analyze and defend against threats involving 3D animations, an operator needs specific tools and knowledge:
**Software:**
**Assimp Viewer:** A simple tool for inspecting Assimp-loaded models.
**Blender:** A powerful, open-source 3D creation suite for creating, rigging, and animating models. Essential for understanding how skeletal animations are constructed.
**Hex Editors (e.g., HxD, Hex Fiend):** For low-level inspection of model files, identifying anomalies and structures.
**Debuggers (e.g., GDB, WinDbg):** For analyzing the runtime behavior of rendering engines and identifying memory corruption or crashes.
**Memory Analysis Tools (e.g., Volatility Framework):** For forensic analysis of system memory to find evidence of malicious 3D assets or processes.
**YARA:** For creating detection rules to identify suspicious 3D files.
**Knowledge:**
**OpenGL/Vulkan API:** Understanding graphics pipeline concepts, shaders, and matrix transformations.
**3D File Formats:** Familiarity with common formats like FBX, glTF, OBJ, and their respective structures for animation data.
**Linear Algebra:** Essential for understanding transformation matrices, quaternions, and vector math.
**C/C++:** The primary languages for graphics programming and working with libraries like Assimp. Understanding memory management is critical.
**Reverse Engineering Principles:** For analyzing unknown or malicious 3D assets.
FAQ
**Can malicious 3D models cause harm?**
Yes. Vulnerabilities in 3D rendering engines can be exploited through malformed models, leading to crashes, data breaches, or remote code execution.
**What is the difference between skeletal animation and vertex animation?**
Skeletal animation deforms a mesh using bones, while vertex animation directly manipulates individual vertices over time. Skeletal animation is generally more efficient and expressive for character animation.
**How does Assimp handle different animation formats?**
Assimp has specific importers for formats that support skeletal animation (like FBX and glTF). It normalizes the data into its internal `aiAnimation` structures, abstracting away the format-specific details.
**Is it possible to hide malware in 3D models?**
While not common, it's technically feasible to embed data or code within unused sections of 3D files, or to exploit vulnerabilities in the processing pipeline to execute malicious code.
Sectemple's Challenge: Anatomical Forensics
Your mission, should you choose to accept it, is to perform a rudimentary forensic analysis on a known vulnerable 3D model.
1. **Obtain a Sample:** Find a publicly available 3D model known for having potential parsing issues or simply a complex skeletal rig. (For educational purposes, you might research known CVEs related to 3D model parsers).
2. **Load with Assimp (Safely):** Write a minimal C++ program using Assimp. Load the model, but *disable* animation importing initially. Verify the model loads correctly.
3. **Analyze Bones:** Re-enable animation importing and specifically extract and print the names and hierarchy of the bones from the `aiScene`.
4. **Identify Potential Weaknesses:** Based on textbook knowledge of animation, what are 2-3 potential areas where a malformed animation sequence could cause issues in a rendering engine (e.g., extreme bone rotations, very long animation sequences, high bone influence counts)? Document these hypothetical weaknesses.
Remember, the aim here is not to break anything, but to understand its construction to better secure it. Document your findings and share your insights on potential defense strategies in the comments below. The digital shadows are vast; let's illuminate them together.
La luz fría del monitor proyecta un código que promete mundos enteros. En el salvaje oeste digital del desarrollo de videojuegos, Unity se alza como un poderoso motor, un martillo capaz de forjar desde simples prototipos hasta universos interactivos. Pero crear un juego de plataformas 3D no es un paseo por el parque; es una travesía llena de desafíos técnicos, donde cada línea de C#, cada ajuste de física, cada animación, cuenta. Hoy no vamos a descifrar logs de seguridad, vamos a desarmar la arquitectura de un juego de plataformas, a diseccionar sus componentes para entender cómo darle vida a ese avatar que saltará, correrá y conquistará mundos virtuales.
1. Introducción y Configuración de Assets
El primer paso es sentar las bases. Antes de escribir una sola línea de código, debemos comprender la estructura del curso y preparar el terreno. Los assets son los bloques de construcción visuales y sonoros que darán forma a nuestra creación. Descargarlos e importarlos correctamente es tan crucial como diseñar la lógica del juego.
Introducción al Curso: Comprendiendo el alcance y los objetivos de esta odisea de desarrollo. (00:00)
Descarga de Assets Gratuitos: Asegura tener a mano los recursos visuales y de audio para tu proyecto. (01:00)
Nota: Los assets son la materia prima; la habilidad para combinarlos es lo que diferencia al artesano del novato.
Importación de Assets: Integrando estos recursos en el entorno de Unity para que estén listos para ser utilizados. (03:44)
2. Personaje y Movimiento
El corazón de un juego de plataformas reside en su personaje. Su movimiento debe ser intuitivo, responsivo, y sobre todo, divertido. Aquí es donde la física de Unity y la programación en C# chocan y se fusionan para crear la ilusión de vida.
Movimiento Básico del Personaje: Estableciendo los fundamentos de cómo nuestro avatar interactúa con el mundo. (9:00)
Salto y Character Controller 3D: Implementando la mecánica esencial del salto, controlando su altura y comportamiento. El Character Controller es tu mejor aliado aquí, manejando colisiones y movimiento de forma eficiente. (17:20)
Movimiento de Cámara con Personaje 3D: La cámara debe seguir al jugador de forma fluida, proporcionando una perspectiva inmersiva sin marear. (26:19)
Rotando al Jugador: Asegurando que la orientación del personaje sea coherente con el entorno y las acciones. (31:25)
Movimiento Basado en Rotación de Cámara: Sincronizando el desplazamiento del jugador con la dirección a la que apunta la cámara. (38:30)
Normalizando Movimiento: Optimizando las entradas de control para evitar comportamientos erráticos. (49:46)
Animar Personaje 3D con Unity: Dando vida visual al personaje a través de animaciones de caminar, correr y posar.
Animación de Salto: Capturando la esencia del movimiento vertical. (1:01:42)
Conectando Controles a Animaciones: Vinculando las acciones del jugador con las animaciones correspondientes para una respuesta visual inmediata. (1:08:42)
3. Sistemas Básicos de Juego
Un juego no vive solo de su personaje principal. Necesita sistemas que añadan desafío, recompensa y estructura. Desde la temida "zona de muerte" hasta la reconfortante presencia de un checkpoint, cada sistema contribuye a la experiencia global.
Ocultando el Cursor: Mejorando la inmersión al eliminar el cursor del sistema operativo en el juego. (01:19:40)
Prefabs y Objetos Reutilizables: La eficiencia en el desarrollo requiere prefabs. Aprender a crearlos y usarlos es clave para el mantenimiento y la escalabilidad. (01:23:00)
Arreglando Gravedad y Bordes: Refinando la física del juego para que se sienta natural y predecible.
Mejorando Animaciones con Fixed Duration: Ajustando la temporalidad de las animaciones para que encajen perfectamente con las mecánicas de juego. (01:31:44)
Zona de Muerte: Definiendo los límites del fracaso y lo que sucede cuando el jugador los cruza. (01:33:25)
Preparando Respawn: Diseñando el mecanismo para que el jugador pueda volver a la acción tras un fallo. (01:36:40)
Moviendo Cámara con Respawn: Asegurando que la transición tras el respawn sea fluida. (01:46:11)
Arreglando Salto al Morir: Evitando comportamientos inesperados del personaje al reaparecer. (01:49:40)
Fade to Black al Morir: Creando una transición visual suave para indicar la muerte del jugador. (01:50:15)
4. Interfaz, Audio y Menús
La interfaz de usuario (UI), el audio y los menús son los guardianes de la experiencia del jugador. Una buena UI comunica información vital, un audio envolvente sumerge al jugador, y menús bien diseñados facilitan la navegación.
Health Pickup y Corazón de Pickup: Implementando mecánicas de recolección que restauran la salud del jugador. (02:48:41, 03:06:25)
Interfaz de Vida UI: Visualizando la salud del jugador de forma clara y atractiva. (03:15:49)
Monedas y Animaciones: Añadiendo elementos coleccionables y haciéndolos visualmente satisfactorios. (03:24:24)
Audio: Integrando efectos de sonido y música para crear una atmósfera inmersiva. (03:37:08)
Ajustando el Audio: Optimizando volúmenes y `mixes` para una experiencia auditiva equilibrada. (03:44:05)
Efectos de Sonido: Añadiendo pistas auditivas para acciones clave. (03:45:18)
Menú de Pausa: Permitiendo al jugador detener la acción, acceder a opciones y reanudar el juego. (03:48:00)
Pausando y Resumiendo el Juego: Implementando la lógica de pausa y reanudación. (03:54:56, 03:59:00)
Menú de Opciones: Añadiendo controles para ajustar parámetros del juego, como el audio. (04:04:24)
Controlando Audio con Sliders: Integrando sliders para ajustar el volumen. (04:13:14)
5. Enemigos y Diseño de Niveles
Ningún juego de plataformas está completo sin adversarios que pongan a prueba las habilidades del jugador y niveles que desafíen su ingenio. Aquí es donde la inteligencia artificial y el diseño de escenarios se encuentran.
Visuales:
Skybox: Creando un fondo atmosférico para tu mundo. (04:22:12)
Agua: Implementando efectos de agua realistas. (04:24:21)
Enemigos (Inteligencia Artificial):
Agregando Enemigos: Introduciendo adversarios en el juego. (04:28:10)
Movimiento en NavMesh: Utilizando sistemas de navegación para que los enemigos se muevan de forma inteligente por el entorno. (04:32:20)
Animando Enemigos: Dando vida a los enemigos con animaciones de ataque, patrullaje y persecución. (04:44:26 - 05:09:36)
Patrullando, Persiguiendo y Atacando: Definiendo el comportamiento de IA de los enemigos. (04:49:25 - 05:09:36)
Regresando a Patrullar: Implementando lógica para que los enemigos vuelvan a sus rutas. (05:09:36)
Daño a Enemigos y Efectos: Definiendo cómo el jugador daña a los enemigos y las consecuencias. (05:19:39 - 05:28:29)
Enemigo Drop Items: Haciendo que los enemigos dejen caer objetos al ser derrotados. (05:33:28)
Niveles:
Agregando Salida de Nivel: Definiendo el objetivo para completar un nivel. (05:35:11)
Cargando Niveles: Implementando la transición entre diferentes escenarios. (05:43:22)
Creando un Nivel: Diseñando la disposición del escenario. (05:54:06)
6. Menús Principales y Selección de Nivel
La navegación principal de un juego, como el menú principal y la selección de niveles, es la puerta de entrada para el jugador. Una estructura clara y funcional mejora significativamente la experiencia.
Creando Menú Principal: Diseñando la interfaz de inicio del juego. (06:10:08)
Funcionalidad al Menú Principal: Implementando las acciones asociadas a los botones del menú principal. (06:17:40)
Player Prefabs: Asegurando que el jugador se cargue correctamente en diferentes contextos. (06:24:12)
Creando Selección de Niveles: Diseñando la interfaz para que los jugadores elijan qué nivel jugar. (06:28:17)
Entrando a Niveles: Implementando la lógica para iniciar un nivel seleccionado. (06:34:28)
Arreglando Tiempos y Desbloqueando Niveles: Optimizando la transición y la progresión del jugador. (06:39:10 - 06:50:10)
Fade to Black al Cargar Nivel: Creando una transición visual para la carga de niveles. (06:50:10)
Desbloquear Puente de Selección de Nivel: Implementando elementos de progresión visual en la interfaz de selección. (06:53:48)
Empezando en el Nivel Correcto: Asegurando que el jugador comience en la posición designada. (06:57:48)
Conteo de Monedas: Mostrando el progreso del jugador en términos de recolección de monedas. (07:13:36)
7. Combate con Jefe y Despliegue
Culminar un juego con una batalla épica contra un jefe es una tradición. Tras superar este desafío, el último paso es empaquetar tu creación para que el mundo pueda disfrutarla.
Preparando Nivel del Jefe: Diseñando el escenario para la confrontación final. (07:22:33)
Trayendo al Jefe: Introduciendo al antagonista principal. (07:23:47)
Colliders del Jefe: Asegurando que las interacciones físicas del jefe sean correctas. (07:26:17)
Animando al Jefe: Dando vida al jefe con animaciones específicas para daño y ataque. (07:31:18 - 07:56:37)
Controlador de Animaciones del Jefe: Gestionando la lógica y el estado de las animaciones del jefe. (08:01:46)
Activando al Jefe: Implementando la lógica para iniciar la batalla. (08:05:03)
Libreto que Controla al Jefe: Creando secuencias de comportamiento y ataques para el jefe. (08:09:03)
Reseteando Jefe al Morir: Implementando la lógica para el comportamiento posterior a la derrota del jefe. (08:17:11)
Dañando al Jefe: Definiendo cómo el jugador inflige daño al jefe. (08:21:31)
Build del Juego Final: El proceso de compilar tu proyecto en un ejecutable listo para distribuir. (08:23:01)
8. Recursos Adicionales
El camino del desarrollador es uno de aprendizaje continuo. Aquí te dejo enlaces clave para profundizar tus conocimientos y expandir tus habilidades en el universo de Unity y C#.
Curso de Programación C#: Domina el lenguaje que da vida a tus juegos. Ver curso completo.
Introducción a Unity 3D: Si eres nuevo en el motor, este es tu punto de partida. Empieza aquí.
9. Veredicto del Ingeniero: ¿Vale la pena adoptar Unity para juegos de plataformas?
Unity no es solo un motor; es un ecosistema. Para la creación de juegos de plataformas 3D, ofrece una curva de aprendizaje manejable, una comunidad robusta y un flujo de trabajo eficiente. La capacidad de iterar rápidamente en el diseño de niveles y la implementación de mecánicas es invaluable.
Pros:
Versatilidad: Ideal para 2D y 3D, abarcando géneros.
Comunidad y Recursos: Abundancia de tutoriales, assets y foros de ayuda.
Multiplataforma: Facilidad para compilar para diversas plataformas.
Sistema de Física Integrado: Potente y configurable para experiencias realistas.
Contras:
Rendimiento en Proyectos Grandes: Requiere optimización cuidadosa para evitar cuellos de botella.
Curva de Aprendizaje para Características Avanzadas: Conceptos como shaders o sistemas de redes pueden ser complejos inicialmente.
Licenciamiento: Las versiones gratuitas tienen limitaciones; las de pago pueden ser costosas para desarrolladores independientes.
En resumen: Para la creación de juegos de plataformas, Unity es una opción sólida y accesible. Permite pasar de la idea a un prototipo jugable en tiempo récord. Si buscas una herramienta que te permita experimentar, iterar y lanzar tu juego, Unity es un fuerte contendiente.
10. Arsenal del Operador/Analista
En el arsenal de un desarrollador serio, ciertas herramientas y conocimientos son indispensables. No se trata solo de saber programar, sino de tener el equipo adecuado y la mentalidad correcta para afrontar los desafíos.
Motor de Juego: Unity 3D (La elección obvia para este tutorial).
Lenguaje de Programación: C# (El lenguaje nativo de Unity).
IDE: Visual Studio o Rider (Para una experiencia de codificación fluida y depuración eficiente).
Gestión de Versiones: Git (Indispensable para cualquier proyecto de software serio, ¡no trabajes sin él!).
Herramientas de Diseño: Blender o Maya (Para modelado 3D si necesitas crear assets personalizados).
Software de Edición de Audio: Audacity o Reaper (Para crear y manipular efectos de sonido y música).
Plataformas de Aprendizaje:
Unity Learn (Recursos oficiales).
YouTube (Canales como este para tutoriales prácticos).
Udemy/Coursera (Cursos estructurados para profundizar).
Libros Clave:
"Unity Game Development Cookbook" por Packt Publishing (Recetas prácticas).
"C# in Depth" por Jon Skeet (Para dominar el lenguaje).
Conceptos Clave:
Principios de Diseño de Juegos.
Mecánicas de Plataformas (Salto, gravedad, control).
Inteligencia Artificial básica para IA de enemigos.
Diseño de Niveles y Curva de Dificultad.
Optimización y Build para Despliegue.
11. Preguntas Frecuentes
¿Necesito ser un programador experto para usar Unity?
No necesariamente. Unity es accesible para principiantes, pero un conocimiento sólido de C# acelerará tu progreso y te permitirá crear mecánicas más complejas.
¿Cuánto tiempo se tarda en crear un juego de plataformas completo?
El tiempo varía enormemente según la complejidad, tu experiencia y la dedicación. Este curso cubre muchas facetas, pero un juego comercialmente viable puede llevar meses o años.
¿Puedo usar estas técnicas para juegos 2D?
Sí, muchos de los principios (movimiento, física, UI, IA básica) son transferibles, aunque Unity tiene herramientas específicas para el desarrollo 2D.
¿Este curso cubre la monetización de juegos?
Este curso se enfoca en el desarrollo técnico. La monetización (ventas, anuncios, etc.) es un aspecto aparte que deberás investigar.
¿Qué hago si encuentro un bug en mi código?
La depuración es parte del proceso. Utiliza las herramientas de depuración de tu IDE (Visual Studio, Rider), revisa la consola de Unity y busca soluciones en foros y documentación.
12. El Contrato: Tu Primer Despliegue
Has recorrido el camino, desde la configuración inicial hasta el build final. Has armado el esqueleto de tu juego de plataformas 3D, dándole vida con mecánicas, enemigos y menús.
El Contrato: Tu misión ahora es tomar este conocimiento y aplicarlo. No te limites a seguir los pasos; experimenta. Modifica la física del salto, introduce un nuevo tipo de enemigo con un patrón de ataque único, o rediseña un nivel para que presente un desafío diferente. La verdadera maestría no se adquiere repitiendo, sino innovando.
El Desafío: Empaqueta tu propio juego de plataformas simple usando las técnicas aprendidas. Enfócate en un bucle de juego corto pero pulido. ¿Puedes crear un nivel donde el jugador deba usar el doble salto y esquivar proyectiles para alcanzar el final? Documenta tu proceso, tus decisiones de diseño y cualquier obstáculo que encuentres. Comparte tus hallazgos y tu código (si te sientes cómodo) en los comentarios.
Ahora, ve y construye. El universo digital espera tu creación.
The digital frontier is a battlefield of imagination, where code is the weapon and game engines are the fortresses. Unity, a behemoth in this realm, stands as a testament to accessible yet powerful game development. Too many approach its vast landscape with the naive optimism of a fresh recruit, only to be overwhelmed by its complexity. This isn't just about clicking buttons; it's about understanding the architecture, the logic, and the subtle exploits that lead to creation. Today, we dissect Unity, not as a beginner's tutorial, but as an entry point into the persistent, analytical mindset required to conquer any development challenge. We'll strip away the fluff and expose the core mechanics that make game development a discipline, not just a hobby.
Unity is more than just a tool; it's an integrated development environment (IDE) that bridges the gap between conceptualization and execution in game development. Its component-based architecture is a critical design choice, allowing for modularity and reusability that any seasoned engineer would appreciate. Understanding this foundation is akin to knowing the enemy's network topology before launching an intrusion. This course, while seemingly beginner-focused, provides the initial reconnaissance needed to navigate Unity’s vast capabilities. We'll cover the essential steps of setting up your environment and understanding the core building blocks.
Setup and Project Initiation: The Digital Forge
The first step in any operation is establishing your base. For Unity, this means installing Unity Hub and the appropriate Unity Editor version. Unity Hub acts as your central command, managing multiple project installations. Choosing the right version isn't trivial; different versions offer varying feature sets and compatibility. For serious development, sticking to LTS (Long-Term Support) releases often proves more stable. Creating a new project is where the mission truly begins. The foundational choices here—2D vs. 3D, template selection—dictate much of the project’s trajectory. Think of it as selecting your exploit vector; the wrong choice can lead to significant rework.
Downloading Unity And Unity Hub: The initial deployment requires Unity Hub. This acts as your mission control, essential for managing different Unity Editor versions and projects. It streamlines the installation process, isolating dependencies and preventing conflicts that could cripple your workflow.
About Unity Versions And Creating A New Project: This is where strategic decisions are made. Do you opt for the bleeding edge with the latest features, or the robust stability of an LTS release? For any critical project, the LTS path is the professional choice. Selecting your project template—2D, 3D, or a specialized URP/HDRP setup—is your initial exploit selection. It sets the stage for the rendering pipeline and core functionalities you'll be working with.
Interface Exploration: Navigating the Battlefield
Once your project is initialized, you're presented with the Unity Editor. This is your primary interface, a complex dashboard of tools and views. Understanding its layout—the Scene view, Game view, Hierarchy, Project, and Inspector windows—is critical. Each window serves a specific purpose, from manipulating objects in 3D space to managing your project’s assets and inspecting component properties. Mastering this interface is about efficiency; knowing where to find critical information and tools quickly can mean the difference between a successful operation and a prolonged, frustrating engagement.
Introduction To Unity's Interface: Familiarize yourself with the core windows: the Scene view for spatial manipulation, the Game view for previewing the player experience, the Hierarchy for managing scene objects, the Project window for asset organization, and the Inspector for component-level configuration. Each is a facet of your command center.
Core Mechanics and Physics: The Laws of the Virtual Universe
Games are simulations, and simulations need rules. Unity’s physics engine brings these rules to life. Concepts like Rigid Bodies and Colliders are fundamental. Rigid Bodies enable objects to respond to physics forces, while Colliders define their physical shape for collision detection. An improperly configured physics system can lead to unpredictable behavior, bugs that are notoriously difficult to track down, akin to phantom network traffic. Precision here is paramount.
Rigid Bodies And Colliders: These components are the bedrock of Unity's physics simulation. Rigidbodies allow game objects to be controlled by the physics engine, reacting to forces, gravity, and collisions. Colliders define the shape of an object for precise physical interaction detection. Configuring these correctly is crucial for realistic object behavior and preventing unexpected collisions or penetrations.
Audio Source And UI Elements: Sound design and user interfaces are not afterthoughts. Audio Sources are components that play audio clips, essential for immersion and feedback. UI Elements, managed through Unity's UI system (UGUI), are how players interact with your game—menus, buttons, health bars—critical for usability and engagement.
Scripting Fundamentals: The Art of Command
Visual scripting has its place, but true control lies in code. Unity primarily uses C# for its scripting capabilities. Understanding variables, functions, and conditional statements is non-negotiable. These are the basic commands that tell your game objects what to do. A poorly written script can introduce vulnerabilities, performance bottlenecks, or logical flaws that compromise the entire game. Approach scripting with the discipline of a seasoned developer.
Moving Our Character With Code: This is your first foray into active control. You'll learn to manipulate object properties like position and rotation via C# scripts, directly influencing the player's interaction within the game world.
Introduction To Variables: Variables are the memory of your program. They store data—player health, score, position—that can change during gameplay. Understanding data types (integers, floats, booleans) and how to declare and use variables is fundamental for any dynamic interaction.
Operations With Variables: Beyond storage, variables can be manipulated. Arithmetic operations, comparisons, and assignments are the arithmetic of game logic. Mastering these allows for complex calculations that drive game mechanics, from damage calculation to movement speed adjustments.
Functions: Functions (or methods in C#) are blocks of reusable code that perform specific tasks. They are essential for organizing your scripts, preventing code duplication, and creating modular, maintainable systems. Think of them as pre-defined exploits you can call upon.
Conditional Statements: Logic hinges on conditions. if, else if, and else statements allow your game to make decisions based on the current state of variables and events. This is the branching logic that creates dynamic gameplay.
Loops: Repetition is often necessary. Loops (for, while) execute a block of code multiple times, invaluable for processing collections of data, repeated actions, or procedural generation.
Advanced Scripting Concepts for Persistence
To build robust systems, you need to move beyond the basics. Coroutines enable asynchronous operations, allowing tasks to run over multiple frames without blocking the main execution thread—crucial for smooth performance. Classes and data encapsulation are pillars of object-oriented programming (OOP), enabling you to model complex game entities and manage their state effectively. Inheritance allows for code reuse by creating hierarchies of related objects. Understanding how to Get Components is also vital; it's how your scripts interact with the various components attached to a game object.
Coroutines: These are functions that can pause execution and return control to Unity, then resume later. They are invaluable for time-based events, sequences, or operations that shouldn't freeze the game.
Classes: Classes are blueprints for creating objects. They define properties (data) and methods (behavior). In Unity, game objects are often represented by GameObjects, and their behavior is extended by scripts written as classes.
Accessibility Modifiers (Data Encapsulation): Keywords like public, private, and protected control the visibility and accessibility of class members. Encapsulation is key to information hiding and creating robust, maintainable code.
Inheritance: This OOP principle allows a class to inherit properties and methods from another class. It's fundamental for creating type hierarchies, such as different types of enemies inheriting from a base Enemy class.
Getting Components: GameObjects in Unity are composed of components. Scripts often need to access other components (like Rigidbodies or other scripts) attached to the same GameObject or different ones. The GetComponent<T>() method is your primary tool for this.
Game Development Deep Dive: The Monster Chase Scenario
This section transitions from foundational concepts to practical application by constructing a "Monster Chase" game. This involves importing assets, creating animations, managing visual layers, and implementing core gameplay mechanics. It's a microcosm of the entire game development lifecycle, demanding an understanding of how different systems interoperate.
Monster Chase Game Intro: This marks the beginning of a practical project, designed to consolidate the previously learned concepts into a tangible outcome.
Importing Assets: Assets are the raw materials of your game—models, textures, sounds, animations. Efficiently importing and organizing these assets within the Project window is crucial for managing workflow.
Creating Player Animations: Animations bring characters and objects to life. Unity’s animation system, coupled with tools like Mecanim, allows you to create complex animation states and transitions, from idle to running to attacking.
Sorting Layers And Order In Layer: In 2D games, precise control over which sprites render on top of others is essential for visual clarity. Sorting Layers and Order in Layer allow you to define this rendering hierarchy.
Creating The Game Background: A compelling game needs an immersive environment. Building backgrounds, whether simple parallax layers or complex parallax scrolling systems, significantly contributes to the game's aesthetic appeal.
Player Movement: Implementing responsive player controls is a cornerstone of game design. This involves translating input (keyboard, gamepad) into character movement logic, often involving physics or direct transform manipulation.
Animating The Player Via Code: While the animation system handles state machines, code often triggers specific animations or blends between them based on game logic, such as initiating an attack animation when the attack button is pressed.
Player Jumping: A common mechanic, jumping requires careful integration with physics. Applying forces or manipulating vertical velocity, often with grounded checks, is key to a satisfying jump.
Camera Follow Player: The camera is the player’s eyes. Implementing a camera that smoothly follows the player, often with features like damping, is vital for maintaining focus and a good player experience.
Enemy Animations: Just like the player, enemies need life. Implementing their animations ensures they react believably to the game state—patrolling, chasing, attacking, or reacting to damage.
Enemy Script: This is where enemy AI logic resides. It dictates how enemies perceive the player, pathfind, and enact their behavior.
Enemy Spawner: Dynamically placing enemies into the game world at appropriate times and locations is managed by spawner systems. This influences difficulty and pacing.
Enemy Collision: Defining how enemies interact with the player and the environment is critical. This often involves collider setups and logic within scripts to handle damage or interaction effects.
The Collector Script: This script likely handles the collection of items or points by the player, managing score updates and item removal from the game world.
UI and UX Engineering: Crafting the User Experience
A game's success hinges not only on its mechanics but also on its usability and presentation. Unity's UI system is powerful, allowing developers to create menus, heads-up displays (HUDs), and interactive elements. Understanding scene management—how to load and unload different game states or levels—is crucial for building a cohesive player journey. Design patterns like Static Variables and the Singleton Pattern become invaluable for managing global game state and ensuring that certain systems are accessible from anywhere, a common tactic in managing complex applications.
Unity's UI System: This comprehensive toolkit allows for the creation of all visual interface elements within your game, from buttons and text fields to health bars and complex menus.
Creating Main Menu: The entry point for most games, the main menu sets the tone and provides navigation to various game states.
Navigating Between Scenes: Games are often broken into multiple scenes (levels, menus). This functionality allows seamless transitions between these distinct parts of the game.
Selecting A Character: Implementing character selection empowers player choice and can influence gameplay mechanics.
Static Variables: Variables declared as static belong to the class itself, not to any specific instance. This makes them accessible globally without needing to instantiate the class, useful for shared data like high scores.
Singleton Pattern: A design pattern ensuring a class has only one instance and provides a global point of access to it. Often used for managers like a Game Manager or Audio Manager.
Architectural Patterns for Scalability
As games grow in complexity, so must their architecture. Events and Delegates provide a powerful, decoupled way for different parts of your game to communicate. Instead of direct method calls, one object can "broadcast" an event, and other objects can "subscribe" to listen for it. This is a sophisticated technique for managing interdependencies and building more robust, modular codebases. It's the digital equivalent of secure, asynchronous communication channels.
Events and Delegates: These are fundamental C# constructs that enable event-driven programming. Delegates act as type-safe function pointers, and events are a mechanism built upon delegates to allow objects to notify others of changes or occurrences without tight coupling.
Instantiating The Selected Character: This refers to the process of creating a new instance of the character object in the game world at runtime, based on the player's selection.
Engineer's Verdict: Is Unity Your Next Weapon?
Unity is an immensely capable platform, offering a rapid development cycle that is hard to match. Its asset store provides a significant advantage, allowing you to leverage pre-built solutions and accelerate your progress. However, its flexibility can be a double-edged sword. Without a disciplined approach to architecture and coding practices, projects can quickly devolve into unmanageable messes. For solo developers or small teams aiming for quick iteration, it's a powerful ally. For large, complex AAA titles demanding absolute control over every engine aspect, custom solutions might still be preferred. Its widespread adoption means a vast community and abundant learning resources, making it an excellent choice for those dedicated to mastering game development.
Operator's Arsenal: Essential Tools and Resources
Mastery in any field requires the right tools and continuous learning. While Unity provides the core environment, supplementing your toolkit is essential for professional development.
Software:
Unity Hub & Unity Editor: The foundational software for all Unity development.
Visual Studio / VS Code: Essential IDEs for C# scripting, offering debugging and code completion.
Git (e.g., GitHub Desktop): Crucial for version control, tracking changes, and collaborating with others.
Aseprite: For pixel art creation and animation.
Blender: A free, powerful 3D modeling and animation software.
Hardware:
A reasonably powerful PC or Mac capable of running the Unity Editor smoothly.
Multiple monitors can significantly enhance workflow efficiency.
Books:
"Unity in Action" by Joe Hocking: A practical, project-based guide.
"Clean Code: A Handbook of Agile Software Craftsmanship" by Robert C. Martin: Essential principles for writing maintainable code, applicable beyond Unity.
"Game Programming Patterns" by Robert Nystrom: Deep dives into architectural patterns used in game development.
Certifications & Platforms:
Unity Certified Programmer: Professional Exam: Demonstrates proficiency in Unity's core programming aspects.
Online Courses (Coursera, Udemy, edX): Numerous specialized courses on Unity, C#, and game design principles.
Unity Learn: Unity's official platform offering tutorials, projects, and learning paths.
FreeCodeCamp: Provides extensive free resources on programming, including game development.
Practical Implementation Guide: Building a Character Controller
Let's put theory into practice. Implementing a functional character controller is a common task. Here's a simplified approach using Unity's built-in physics system.
Create a New C# Script: In your Project window, right-click -> Create -> C# Script. Name it PlayerController.
Attach Script to Player GameObject: Drag the PlayerController script onto your player GameObject in the Hierarchy. Ensure the player has a Rigidbody and a Collider component attached.
Add Movement Logic: Open the PlayerController script and add the following code:
using UnityEngine;

public class PlayerController : MonoBehaviour
{
    public float moveSpeed = 5f;
    public float jumpForce = 10f;
    private Rigidbody rb;
    private bool isGrounded;

    void Start()
    {
        rb = GetComponent<Rigidbody>();
    }

    void Update()
    {
        // Horizontal movement
        float moveInput = Input.GetAxis("Horizontal");
        Vector3 movement = new Vector3(moveInput, 0f, 0f) * moveSpeed;
        rb.MovePosition(transform.position + movement * Time.deltaTime);

        // Jumping
        if (Input.GetButtonDown("Jump") && isGrounded)
        {
            rb.AddForce(Vector3.up * jumpForce, ForceMode.Impulse);
            isGrounded = false; // Prevent double jumping
        }
    }

    void OnCollisionEnter(Collision collision)
    {
        // Basic ground check
        if (collision.gameObject.CompareTag("Ground"))
        {
            isGrounded = true;
        }
    }
}
Configure Player and Ground:
Select your player GameObject. In the Inspector, set the Move Speed and Jump Force in the PlayerController script.
Ensure your player GameObject has a Rigidbody component.
Create a ground plane (GameObject -> 3D Object -> Plane).
Add a Collider component to your ground object if it doesn't have one.
Tag your ground object with the tag "Ground". To do this, select the ground object, and in the Inspector, find the "Tag" dropdown, click "Add Tag...", and create a new tag named "Ground". Then, re-select the ground object and assign it the "Ground" tag.
Input Manager: Unity's Input Manager (Edit -> Project Settings -> Input Manager) defines "Horizontal" and "Jump". Ensure these are set up.
Frequently Asked Questions
Is Unity suitable for beginners?
Yes, Unity offers a comprehensive learning curve. While its depth can be daunting, its beginner-friendly features and extensive documentation make it accessible for newcomers. Many free tutorials and courses are available.
What programming language does Unity use?
Unity primarily uses C# (C-Sharp) for scripting. It also supports a visual scripting solution called Bolt.
How much does Unity cost?
Unity offers several tiers, including a Personal plan which is free for individuals and companies with less than $100,000 in revenue or funding within the last 12 months. Paid tiers offer additional features and support.
Can I create 2D and 3D games with Unity?
Absolutely. Unity is a versatile engine designed for both 2D and 3D game development, offering specific workflows and tools for each.
What are the minimum system requirements for Unity?
System requirements vary depending on the Unity version, but generally, a modern multi-core processor, a dedicated graphics card, and sufficient RAM (8GB or more recommended) are advisable for a smooth development experience.
The Contract: Your First Persistent Game Element
You've laid the groundwork, navigated the interface, and begun scripting. Now, prove your understanding by implementing a core game mechanic that persists across gameplay. Your mission, should you choose to accept it, is to create a simple scoring system. When the player successfully collects an item (you can create a simple collectible object and tag it "Collectible"), increment a score and display it on screen using Unity's UI Text element.
This requires:
Modifying the PlayerController or creating a new ScoreManager script.
Implementing logic to detect collision with "Collectible" tagged objects.
Updating a score variable (consider using a static variable for simplicity here).
Creating a UI Text element in the Canvas and linking it to your score variable to display the current score.
Document your approach and any challenges encountered. The digital world awaits your persistent code.
```
Mastering Unity: A Deep Dive into Game Development for Aspiring Coders
The digital frontier is a battlefield of imagination, where code is the weapon and game engines are the fortresses. Unity, a behemoth in this realm, stands as a testament to accessible yet powerful game development. Too many approach its vast landscape with the naive optimism of a fresh recruit, only to be overwhelmed by its complexity. This isn't just about clicking buttons; it's about understanding the architecture, the logic, and the subtle exploits that lead to creation. Today, we dissect Unity, not as a beginner's tutorial, but as an entry point into the persistent, analytical mindset required to conquer any development challenge. We'll strip away the fluff and expose the core mechanics that make game development a discipline, not just a hobby.
Unity is more than just a tool; it's an integrated development environment (IDE) that bridges the gap between conceptualization and execution in game development. Its component-based architecture is a critical design choice, allowing for modularity and reusability that any seasoned engineer would appreciate. Understanding this foundation is akin to knowing the enemy's network topology before launching an intrusion. This course, while seemingly beginner-focused, provides the initial reconnaissance needed to navigate Unity’s vast capabilities. We'll cover the essential steps of setting up your environment and understanding the core building blocks.
Setup and Project Initiation: The Digital Forge
The first step in any operation is establishing your base. For Unity, this means installing Unity Hub and the appropriate Unity Editor version. Unity Hub acts as your central command, managing multiple project installations. Choosing the right version isn't trivial; different versions offer varying feature sets and compatibility. For serious development, sticking to LTS (Long-Term Support) releases often proves more stable. Creating a new project is where the mission truly begins. The foundational choices here—2D vs. 3D, template selection—dictate much of the project’s trajectory. Think of it as selecting your exploit vector; the wrong choice can lead to significant rework.
Downloading Unity And Unity Hub: The initial deployment requires Unity Hub. This acts as your mission control, essential for managing different Unity Editor versions and projects. It streamlines the installation process, isolating dependencies and preventing conflicts that could cripple your workflow.
About Unity Versions And Creating A New Project: This is where strategic decisions are made. Do you opt for the bleeding edge with the latest features, or the robust stability of an LTS release? For any critical project, the LTS path is the professional choice. Selecting your project template—2D, 3D, or a specialized URP/HDRP setup—is your initial exploit selection. It sets the stage for the rendering pipeline and core functionalities you'll be working with.
Interface Exploration: Navigating the Battlefield
Once your project is initialized, you're presented with the Unity Editor. This is your primary interface, a complex dashboard of tools and views. Understanding its layout—the Scene view, Game view, Hierarchy, Project, and Inspector windows—is critical. Each window serves a specific purpose, from manipulating objects in 3D space to managing your project’s assets and inspecting component properties. Mastering this interface is about efficiency; knowing where to find critical information and tools quickly can mean the difference between a successful operation and a prolonged, frustrating engagement.
Introduction To Unity's Interface: Familiarize yourself with the core windows: the Scene view for spatial manipulation, the Game view for previewing the player experience, the Hierarchy for managing scene objects, the Project window for asset organization, and the Inspector for component-level configuration. Each is a facet of your command center.
Core Mechanics and Physics: The Laws of the Virtual Universe
Games are simulations, and simulations need rules. Unity’s physics engine brings these rules to life. Concepts like Rigid Bodies and Colliders are fundamental. Rigid Bodies enable objects to respond to physics forces, while Colliders define their physical shape for collision detection. An improperly configured physics system can lead to unpredictable behavior, bugs that are notoriously difficult to track down, akin to phantom network traffic. Precision here is paramount.
Rigid Bodies And Colliders: These components are the bedrock of Unity's physics simulation. Rigidbodies allow game objects to be controlled by the physics engine, reacting to forces, gravity, and collisions. Colliders define the shape of an object for precise physical interaction detection. Configuring these correctly is crucial for realistic object behavior and preventing unexpected collisions or penetrations.
Audio Source And UI Elements: Sound design and user interfaces are not afterthoughts. Audio Sources are components that play audio clips, essential for immersion and feedback. UI Elements, managed through Unity's UI system (UGUI), are how players interact with your game—menus, buttons, health bars—critical for usability and engagement.
Scripting Fundamentals: The Art of Command
Visual scripting has its place, but true control lies in code. Unity primarily uses C# for its scripting capabilities. Understanding variables, functions, and conditional statements is non-negotiable. These are the basic commands that tell your game objects what to do. A poorly written script can introduce vulnerabilities, performance bottlenecks, or logical flaws that compromise the entire game. Approach scripting with the discipline of a seasoned developer.
Moving Our Character With Code: This is your first foray into active control. You'll learn to manipulate object properties like position and rotation via C# scripts, directly influencing the player's interaction within the game world.
Introduction To Variables: Variables are the memory of your program. They store data—player health, score, position—that can change during gameplay. Understanding data types (integers, floats, booleans) and how to declare and use variables is fundamental for any dynamic interaction.
Operations With Variables: Beyond storage, variables can be manipulated. Arithmetic operations, comparisons, and assignments are the arithmetic of game logic. Mastering these allows for complex calculations that drive game mechanics, from damage calculation to movement speed adjustments.
Functions: Functions (or methods in C#) are blocks of reusable code that perform specific tasks. They are essential for organizing your scripts, preventing code duplication, and creating modular, maintainable systems. Think of them as pre-defined exploits you can call upon.
Conditional Statements: Logic hinges on conditions. if, else if, and else statements allow your game to make decisions based on the current state of variables and events. This is the branching logic that creates dynamic gameplay.
Loops: Repetition is often necessary. Loops (for, while) execute a block of code multiple times, invaluable for processing collections of data, repeated actions, or procedural generation.
Advanced Scripting Concepts for Persistence
To build robust systems, you need to move beyond the basics. Coroutines enable asynchronous operations, allowing tasks to run over multiple frames without blocking the main execution thread—crucial for smooth performance. Classes and data encapsulation are pillars of object-oriented programming (OOP), enabling you to model complex game entities and manage their state effectively. Inheritance allows for code reuse by creating hierarchies of related objects. Understanding how to Get Components is also vital; it's how your scripts interact with the various components attached to a game object.
Coroutines: These are functions that can pause execution and return control to Unity, then resume later. They are invaluable for time-based events, sequences, or operations that shouldn't freeze the game.
Classes: Classes are blueprints for creating objects. They define properties (data) and methods (behavior). In Unity, game objects are often represented by GameObjects, and their behavior is extended by scripts written as classes.
Accessibility Modifiers (Data Encapsulation): Keywords like public, private, and protected control the visibility and accessibility of class members. Encapsulation is key to information hiding and creating robust, maintainable code.
Inheritance: This OOP principle allows a class to inherit properties and methods from another class. It's fundamental for creating type hierarchies, such as different types of enemies inheriting from a base Enemy class.
Getting Components: GameObjects in Unity are composed of components. Scripts often need to access other components (like Rigidbodies or other scripts) attached to the same GameObject or different ones. The GetComponent<T>() method is your primary tool for this.
Game Development Deep Dive: The Monster Chase Scenario
This section transitions from foundational concepts to practical application by constructing a "Monster Chase" game. This involves importing assets, creating animations, managing visual layers, and implementing core gameplay mechanics. It's a microcosm of the entire game development lifecycle, demanding an understanding of how different systems interoperate.
Monster Chase Game Intro: This marks the beginning of a practical project, designed to consolidate the previously learned concepts into a tangible outcome.
Importing Assets: Assets are the raw materials of your game—models, textures, sounds, animations. Efficiently importing and organizing these assets within the Project window is crucial for managing workflow.
Creating Player Animations: Animations bring characters and objects to life. Unity’s animation system, coupled with tools like Mecanim, allows you to create complex animation states and transitions, from idle to running to attacking.
Sorting Layers And Order In Layer: In 2D games, precise control over which sprites render on top of others is essential for visual clarity. Sorting Layers and Order in Layer allow you to define this rendering hierarchy.
Creating The Game Background: A compelling game needs an immersive environment. Building backgrounds, whether simple parallax layers or complex parallax scrolling systems, significantly contributes to the game's aesthetic appeal.
Player Movement: Implementing responsive player controls is a cornerstone of game design. This involves translating input (keyboard, gamepad) into character movement logic, often involving physics or direct transform manipulation.
Animating The Player Via Code: While the animation system handles state machines, code often triggers specific animations or blends between them based on game logic, such as initiating an attack animation when the attack button is pressed.
Player Jumping: A common mechanic, jumping requires careful integration with physics. Applying forces or manipulating vertical velocity, often with grounded checks, is key to a satisfying jump.
Camera Follow Player: The camera is the player’s eyes. Implementing a camera that smoothly follows the player, often with features like damping, is vital for maintaining focus and a good player experience.
Enemy Animations: Just like the player, enemies need life. Implementing their animations ensures they react believably to the game state—patrolling, chasing, attacking, or reacting to damage.
Enemy Script: This is where enemy AI logic resides. It dictates how enemies perceive the player, pathfind, and enact their behavior.
Enemy Spawner: Dynamically placing enemies into the game world at appropriate times and locations is managed by spawner systems. This influences difficulty and pacing.
Enemy Collision: Defining how enemies interact with the player and the environment is critical. This often involves collider setups and logic within scripts to handle damage or interaction effects.
The Collector Script: This script likely handles the collection of items or points by the player, managing score updates and item removal from the game world.
UI and UX Engineering: Crafting the User Experience
A game's success hinges not only on its mechanics but also on its usability and presentation. Unity's UI system is powerful, allowing developers to create menus, heads-up displays (HUDs), and interactive elements. Understanding scene management—how to load and unload different game states or levels—is crucial for building a cohesive player journey. Design patterns like Static Variables and the Singleton Pattern become invaluable for managing global game state and ensuring that certain systems are accessible from anywhere, a common tactic in managing complex applications.
Unity's UI System: This comprehensive toolkit allows for the creation of all visual interface elements within your game, from buttons and text fields to health bars and complex menus.
Creating Main Menu: The entry point for most games, the main menu sets the tone and provides navigation to various game states.
Navigating Between Scenes: Games are often broken into multiple scenes (levels, menus). This functionality allows seamless transitions between these distinct parts of the game.
Selecting A Character: Implementing character selection empowers player choice and can influence gameplay mechanics.
Static Variables: Variables declared as static belong to the class itself, not to any specific instance. This makes them accessible globally without needing to instantiate the class, useful for shared data like high scores.
Singleton Pattern: A design pattern ensuring a class has only one instance and provides a global point of access to it. Often used for managers like a Game Manager or Audio Manager.
Architectural Patterns for Scalability
As games grow in complexity, so must their architecture. Events and Delegates provide a powerful, decoupled way for different parts of your game to communicate. Instead of direct method calls, one object can "broadcast" an event, and other objects can "subscribe" to listen for it. This is a sophisticated technique for managing interdependencies and building more robust, modular codebases. It's the digital equivalent of secure, asynchronous communication channels.
Events and Delegates: These are fundamental C# constructs that enable event-driven programming. Delegates act as type-safe function pointers, and events are a mechanism built upon delegates to allow objects to notify others of changes or occurrences without tight coupling.
Instantiating The Selected Character: This refers to the process of creating a new instance of the character object in the game world at runtime, based on the player's selection.
Engineer's Verdict: Is Unity Your Next Weapon?
Unity is an immensely capable platform, offering a rapid development cycle that is hard to match. Its asset store provides a significant advantage, allowing you to leverage pre-built solutions and accelerate your progress. However, its flexibility can be a double-edged sword. Without a disciplined approach to architecture and coding practices, projects can quickly devolve into unmanageable messes. For solo developers or small teams aiming for quick iteration, it's a powerful ally. For large, complex AAA titles demanding absolute control over every engine aspect, custom solutions might still be preferred. Its widespread adoption means a vast community and abundant learning resources, making it an excellent choice for those dedicated to mastering game development.
Operator's Arsenal: Essential Tools and Resources
Mastery in any field requires the right tools and continuous learning. While Unity provides the core environment, supplementing your toolkit is essential for professional development.
Software:
Unity Hub & Unity Editor: The foundational software for all Unity development.
Visual Studio / VS Code: Essential IDEs for C# scripting, offering debugging and code completion.
Git (e.g., GitHub Desktop): Crucial for version control, tracking changes, and collaborating with others.
Aseprite: For pixel art creation and animation.
Blender: A free, powerful 3D modeling and animation software.
Hardware:
A reasonably powerful PC or Mac capable of running the Unity Editor smoothly.
Multiple monitors can significantly enhance workflow efficiency.
Books:
"Unity in Action" by Joe Hocking: A practical, project-based guide.
"Clean Code: A Handbook of Agile Software Craftsmanship" by Robert C. Martin: Essential principles for writing maintainable code, applicable beyond Unity.
"Game Programming Patterns" by Robert Nystrom: Deep dives into architectural patterns used in game development.
Certifications & Platforms:
Unity Certified Programmer: Professional Exam: Demonstrates proficiency in Unity's core programming aspects.
Online Courses (Coursera, Udemy, edX): Numerous specialized courses on Unity, C#, and game design principles.
Unity Learn: Unity's official platform offering tutorials, projects, and learning paths.
FreeCodeCamp: Provides extensive free resources on programming, including game development.
Practical Implementation Guide: Building a Character Controller
Let's put theory into practice. Implementing a functional character controller is a common task. Here's a simplified approach using Unity's built-in physics system.
Create a New C# Script: In your Project window, right-click -> Create -> C# Script. Name it PlayerController.
Attach Script to Player GameObject: Drag the PlayerController script onto your player GameObject in the Hierarchy. Ensure the player has a Rigidbody and a Collider component attached.
Add Movement Logic: Open the PlayerController script and add the following code:
using UnityEngine;

public class PlayerController : MonoBehaviour
{
    public float moveSpeed = 5f;
    public float jumpForce = 10f;
    private Rigidbody rb;
    private bool isGrounded;

    void Start()
    {
        rb = GetComponent<Rigidbody>();
    }

    void Update()
    {
        // Horizontal movement
        float moveInput = Input.GetAxis("Horizontal");
        Vector3 movement = new Vector3(moveInput, 0f, 0f) * moveSpeed;
        rb.MovePosition(transform.position + movement * Time.deltaTime);

        // Jumping
        if (Input.GetButtonDown("Jump") && isGrounded)
        {
            rb.AddForce(Vector3.up * jumpForce, ForceMode.Impulse);
            isGrounded = false; // Prevent double jumping
        }
    }

    void OnCollisionEnter(Collision collision)
    {
        // Basic ground check
        if (collision.gameObject.CompareTag("Ground"))
        {
            isGrounded = true;
        }
    }
}
Configure Player and Ground:
Select your player GameObject. In the Inspector, set the Move Speed and Jump Force in the PlayerController script.
Ensure your player GameObject has a Rigidbody component.
Create a ground plane (GameObject -> 3D Object -> Plane).
Add a Collider component to your ground object if it doesn't have one.
Tag your ground object with the tag "Ground". To do this, select the ground object, and in the Inspector, find the "Tag" dropdown, click "Add Tag...", and create a new tag named "Ground". Then, re-select the ground object and assign it the "Ground" tag.
Input Manager: Unity's Input Manager (Edit -> Project Settings -> Input Manager) defines "Horizontal" and "Jump". Ensure these are set up.
Frequently Asked Questions
Is Unity suitable for beginners?
Yes, Unity offers a comprehensive learning curve. While its depth can be daunting, its beginner-friendly features and extensive documentation make it accessible for newcomers. Many free tutorials and courses are available.
What programming language does Unity use?
Unity primarily uses C# (C-Sharp) for scripting. It also supports a visual scripting solution called Bolt.
How much does Unity cost?
Unity offers several tiers, including a Personal plan which is free for individuals and companies with less than $100,000 in revenue or funding within the last 12 months. Paid tiers offer additional features and support.
Can I create 2D and 3D games with Unity?
Absolutely. Unity is a versatile engine designed for both 2D and 3D game development, offering specific workflows and tools for each.
What are the minimum system requirements for Unity?
System requirements vary depending on the Unity version, but generally, a modern multi-core processor, a dedicated graphics card, and sufficient RAM (8GB or more recommended) are advisable for a smooth development experience.
The Contract: Your First Persistent Game Element
You've laid the groundwork, navigated the interface, and begun scripting. Now, prove your understanding by implementing a core game mechanic that persists across gameplay. Your mission, should you choose to accept it, is to create a simple scoring system. When the player successfully collects an item (you can create a simple collectible object and tag it "Collectible"), increment a score and display it on screen using Unity's UI Text element.
This requires:
Modifying the PlayerController or creating a new ScoreManager script.
Implementing logic to detect collision with "Collectible" tagged objects.
Updating a score variable (consider using a static variable for simplicity here).
Creating a UI Text element in the Canvas and linking it to your score variable to display the current score.
Document your approach and any challenges encountered. The digital world awaits your persistent code.